How To-Solarize Your Film (it’s easier than you think)
When I had my film renaissance, it didn’t take long for me to learn that the biggest reason to use film was because of the seemingly endless ways you can play with it.
You can light leak it, soup it, easily create your own cameras for it, and expose both sides of it to name a few. During this time, I also happened to write for a blog, because the fun of learning techniques is to share them with others. (You can find the articles here.)
Although my play hasn’t stopped, it’s mostly been either with techniques I had already learned or physical prints (especially with cyanotypes). So when we were inspired this month in The Art Lab by Man Ray, I knew that playing with film was on the docket. I already had my idea in mind, the question was just if I’d get it to work.
So what was my idea? It was solarization. Man Ray and Lee Miller’s solarization has fascinated me and is paradigmatic of the reasons I love film: the hands-on process of film means “accidents” are bound to happen, which really is just where the magic takes place.
What is Solarization?
The “accident” of solarization occurred when Lee Miller (Man Ray’s artistic partner at the time) was in the darkroom developing film. A mouse ran over her foot and in a panic she flipped on the light switch (the one rule of the darkroom is to NEVER flip on the switch). Realizing her error, she turned it off and finished developing the film.
What resulted in this exposure to light during the development process was a partial tone reversal of the images, giving a surreal slant to the image. You look at solarized images and can’t *quite* figure out what’s happening. Because of a partial tone reversal, you see a partially positive/partially negative image, and the lines of reality blur to the point that the longer you look at it, the more you can’t quite remember which is which.
(Below you see the signature Mackie lines, which are the glowing lines around high-contrast edges. What would be the deepest shadows has reversed tones to become whites.)
(Also note: neither Lee Miller nor Man Ray actually invented this. It was discovered years ago and named the Sabattier effect. But they did uncover it, which can feel a lot like inventing and is just as exciting.)
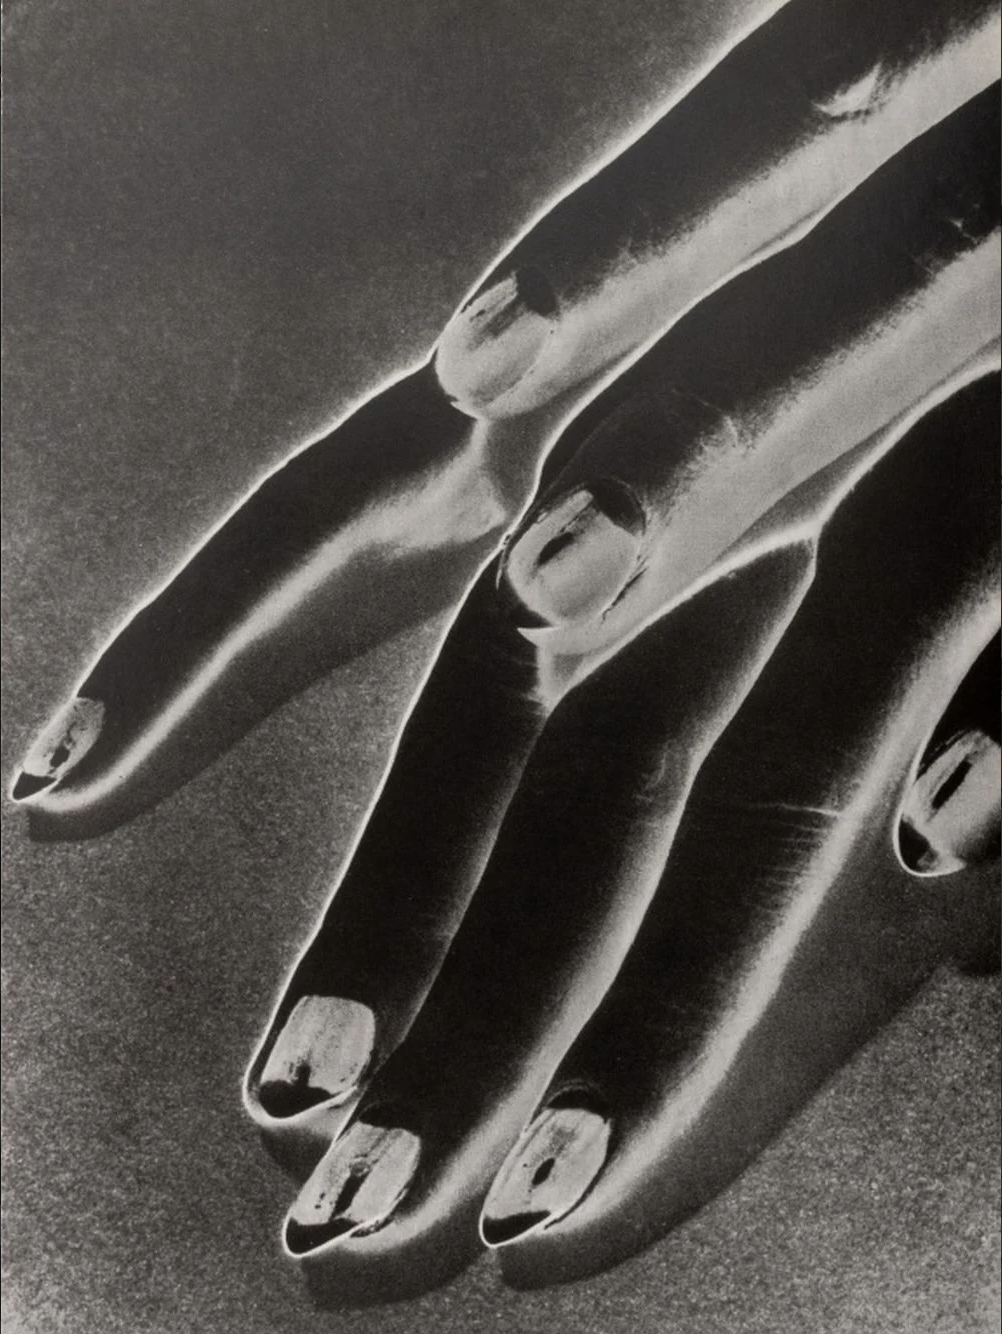
Man Ray solarized print
Doing what you’re NEVER supposed to do with film is one of my favorite past times, and is often a guide. As soon as I hear you’re not supposed to do something with film, I like to run right toward it.
But I will admit it wasn’t so much Man Ray’s work that inspired me, as it was a friend of mine whose solarized images really lit the fire. Yearrrrs ago John Adams showed me some images that his lab sent back to him that had been exposed to light during development. They were for a client shoot, so when you get a roll of film back from your lab with a note that “sorry we accidentally ruined your film” you probably aren’t thanking your lucky stars and citing the hands-on nature of film and its accidents as being a feature and not a bug.
Instead of panicking (John is very cool and not a panicker like me), he converted the images to black and white, made some tweaks, and ended up with some of my favorite images I’ve ever seen.
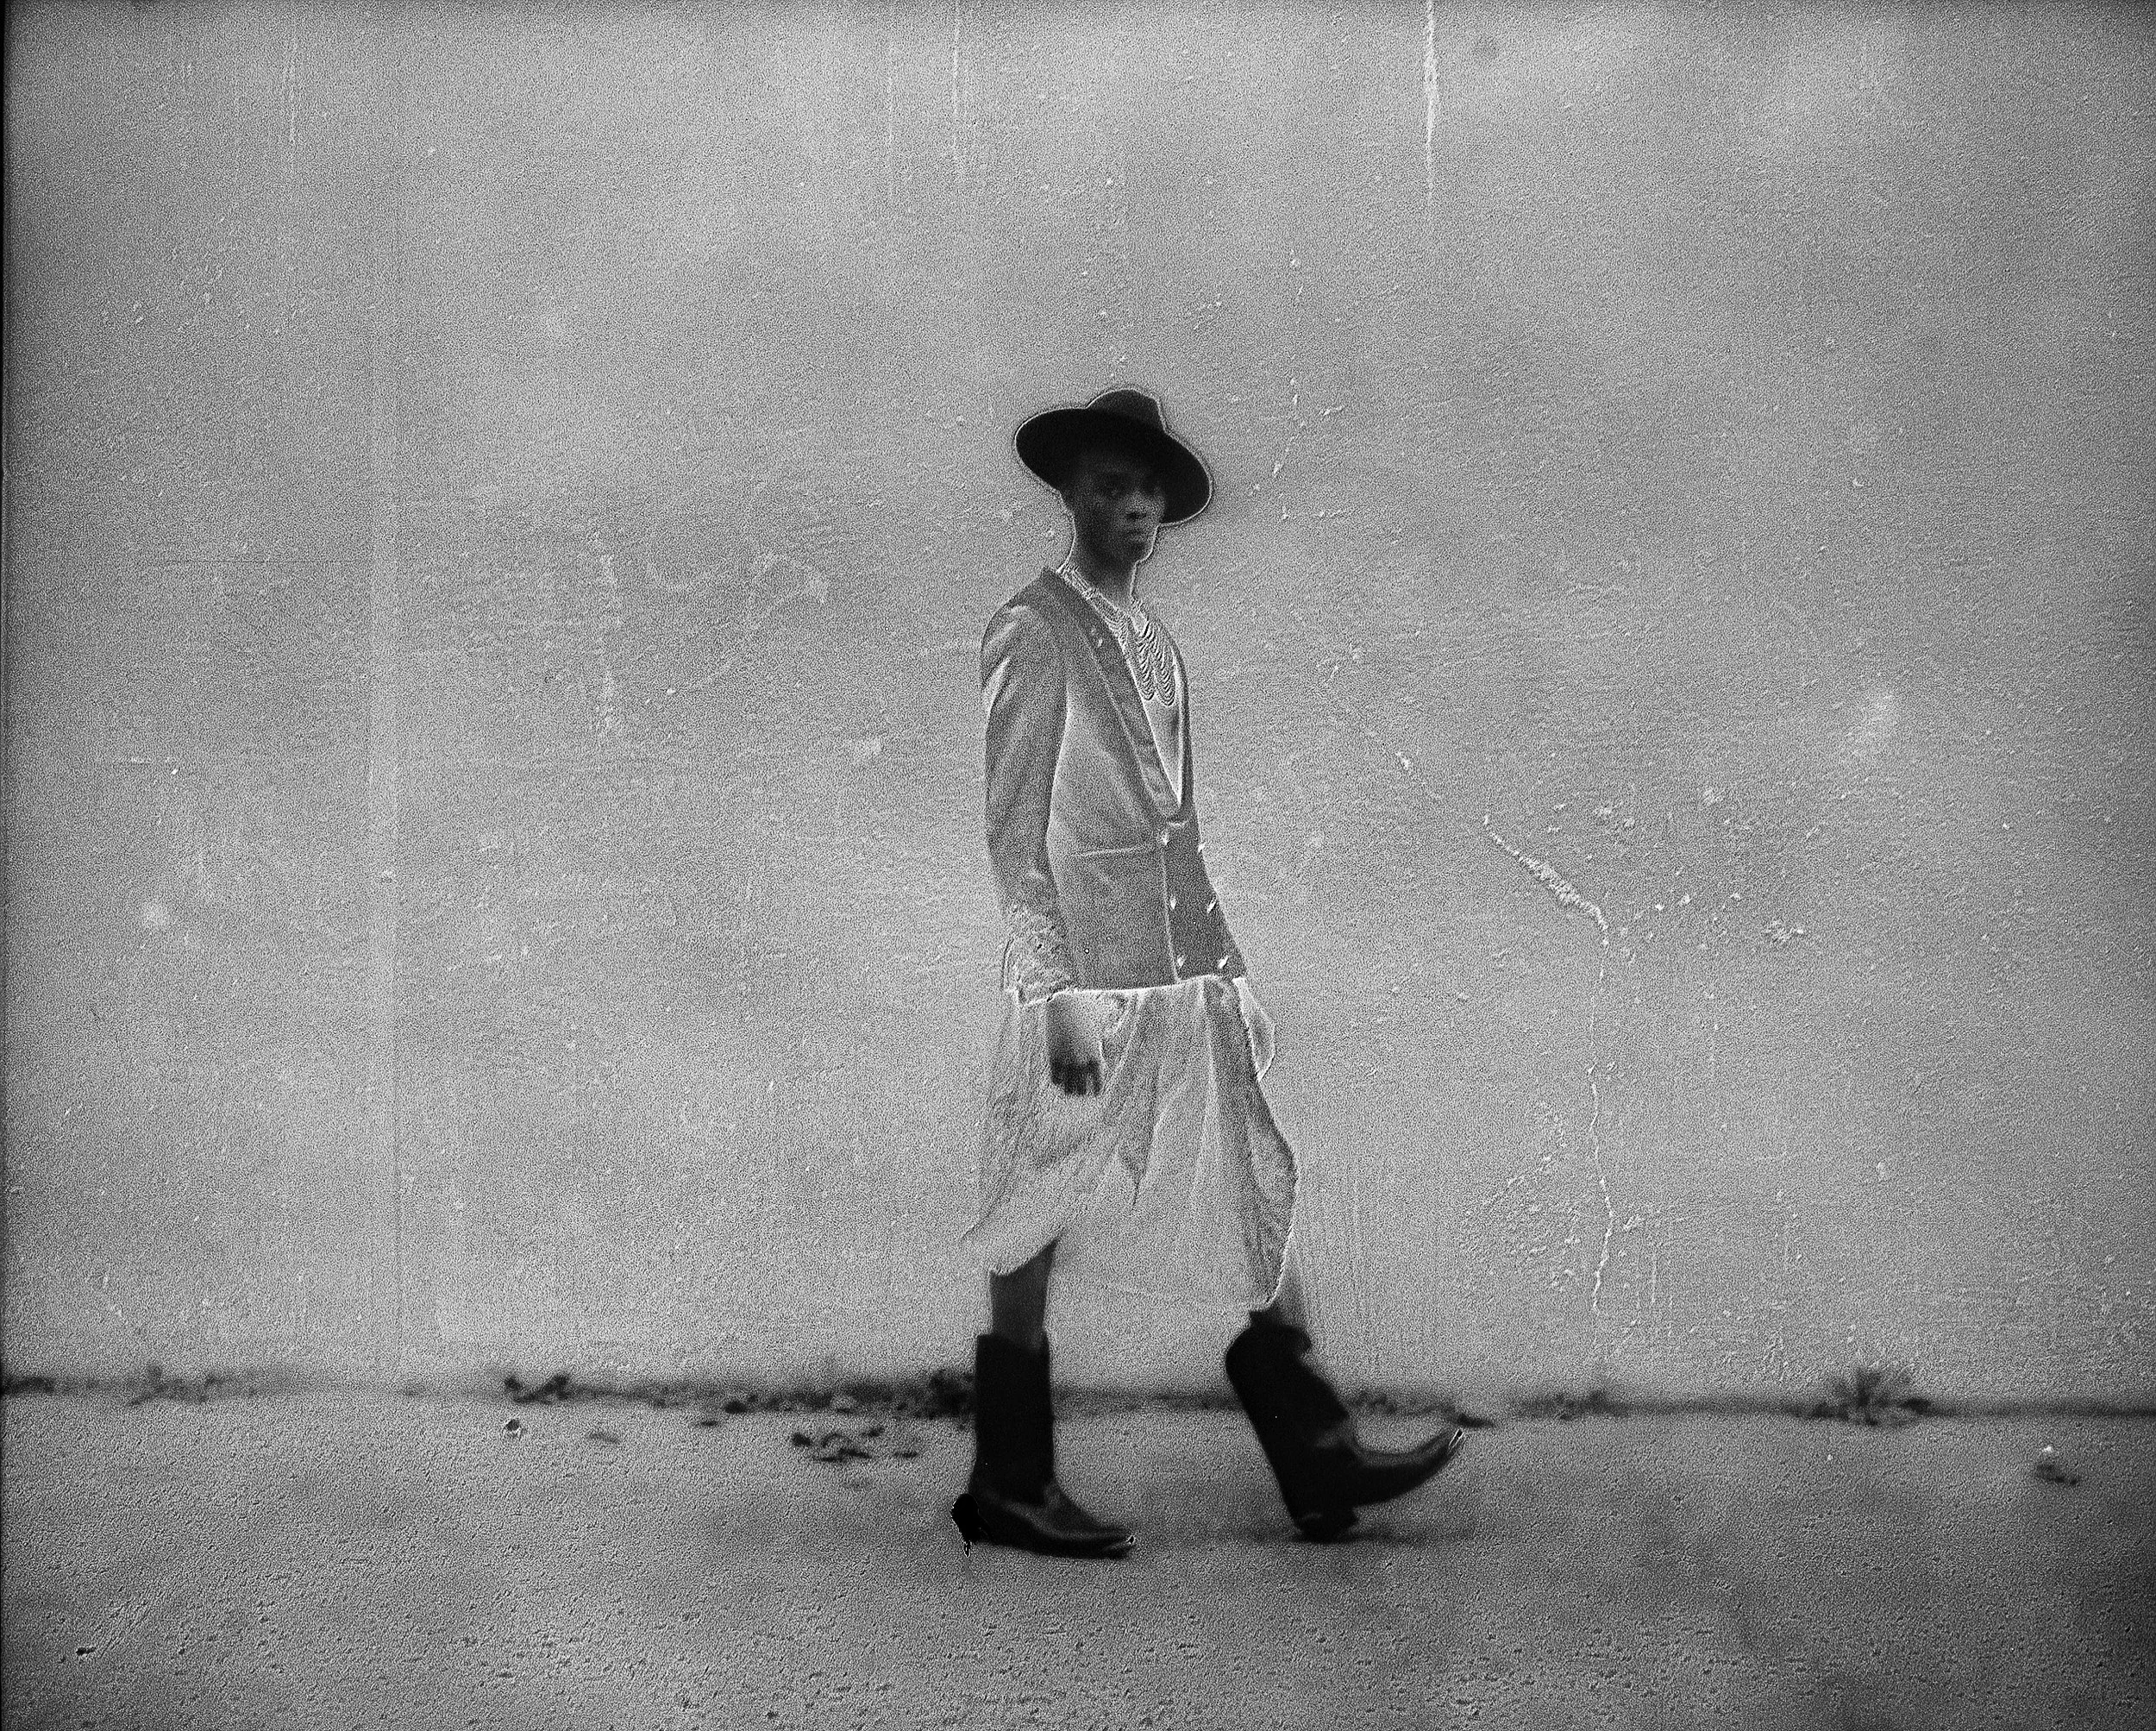
image by John Adams
I tried asking him all sorts of questions in an effort to duplicate the process (at what point did the lights turn on? During development? During bleach? For how long? What did they do after?), but unfortunately all the lab said was that an accident occurred and they had to turn the lights on for a second.
(As if they didn’t even care some of us might want to know how to specifically ruin our film.)
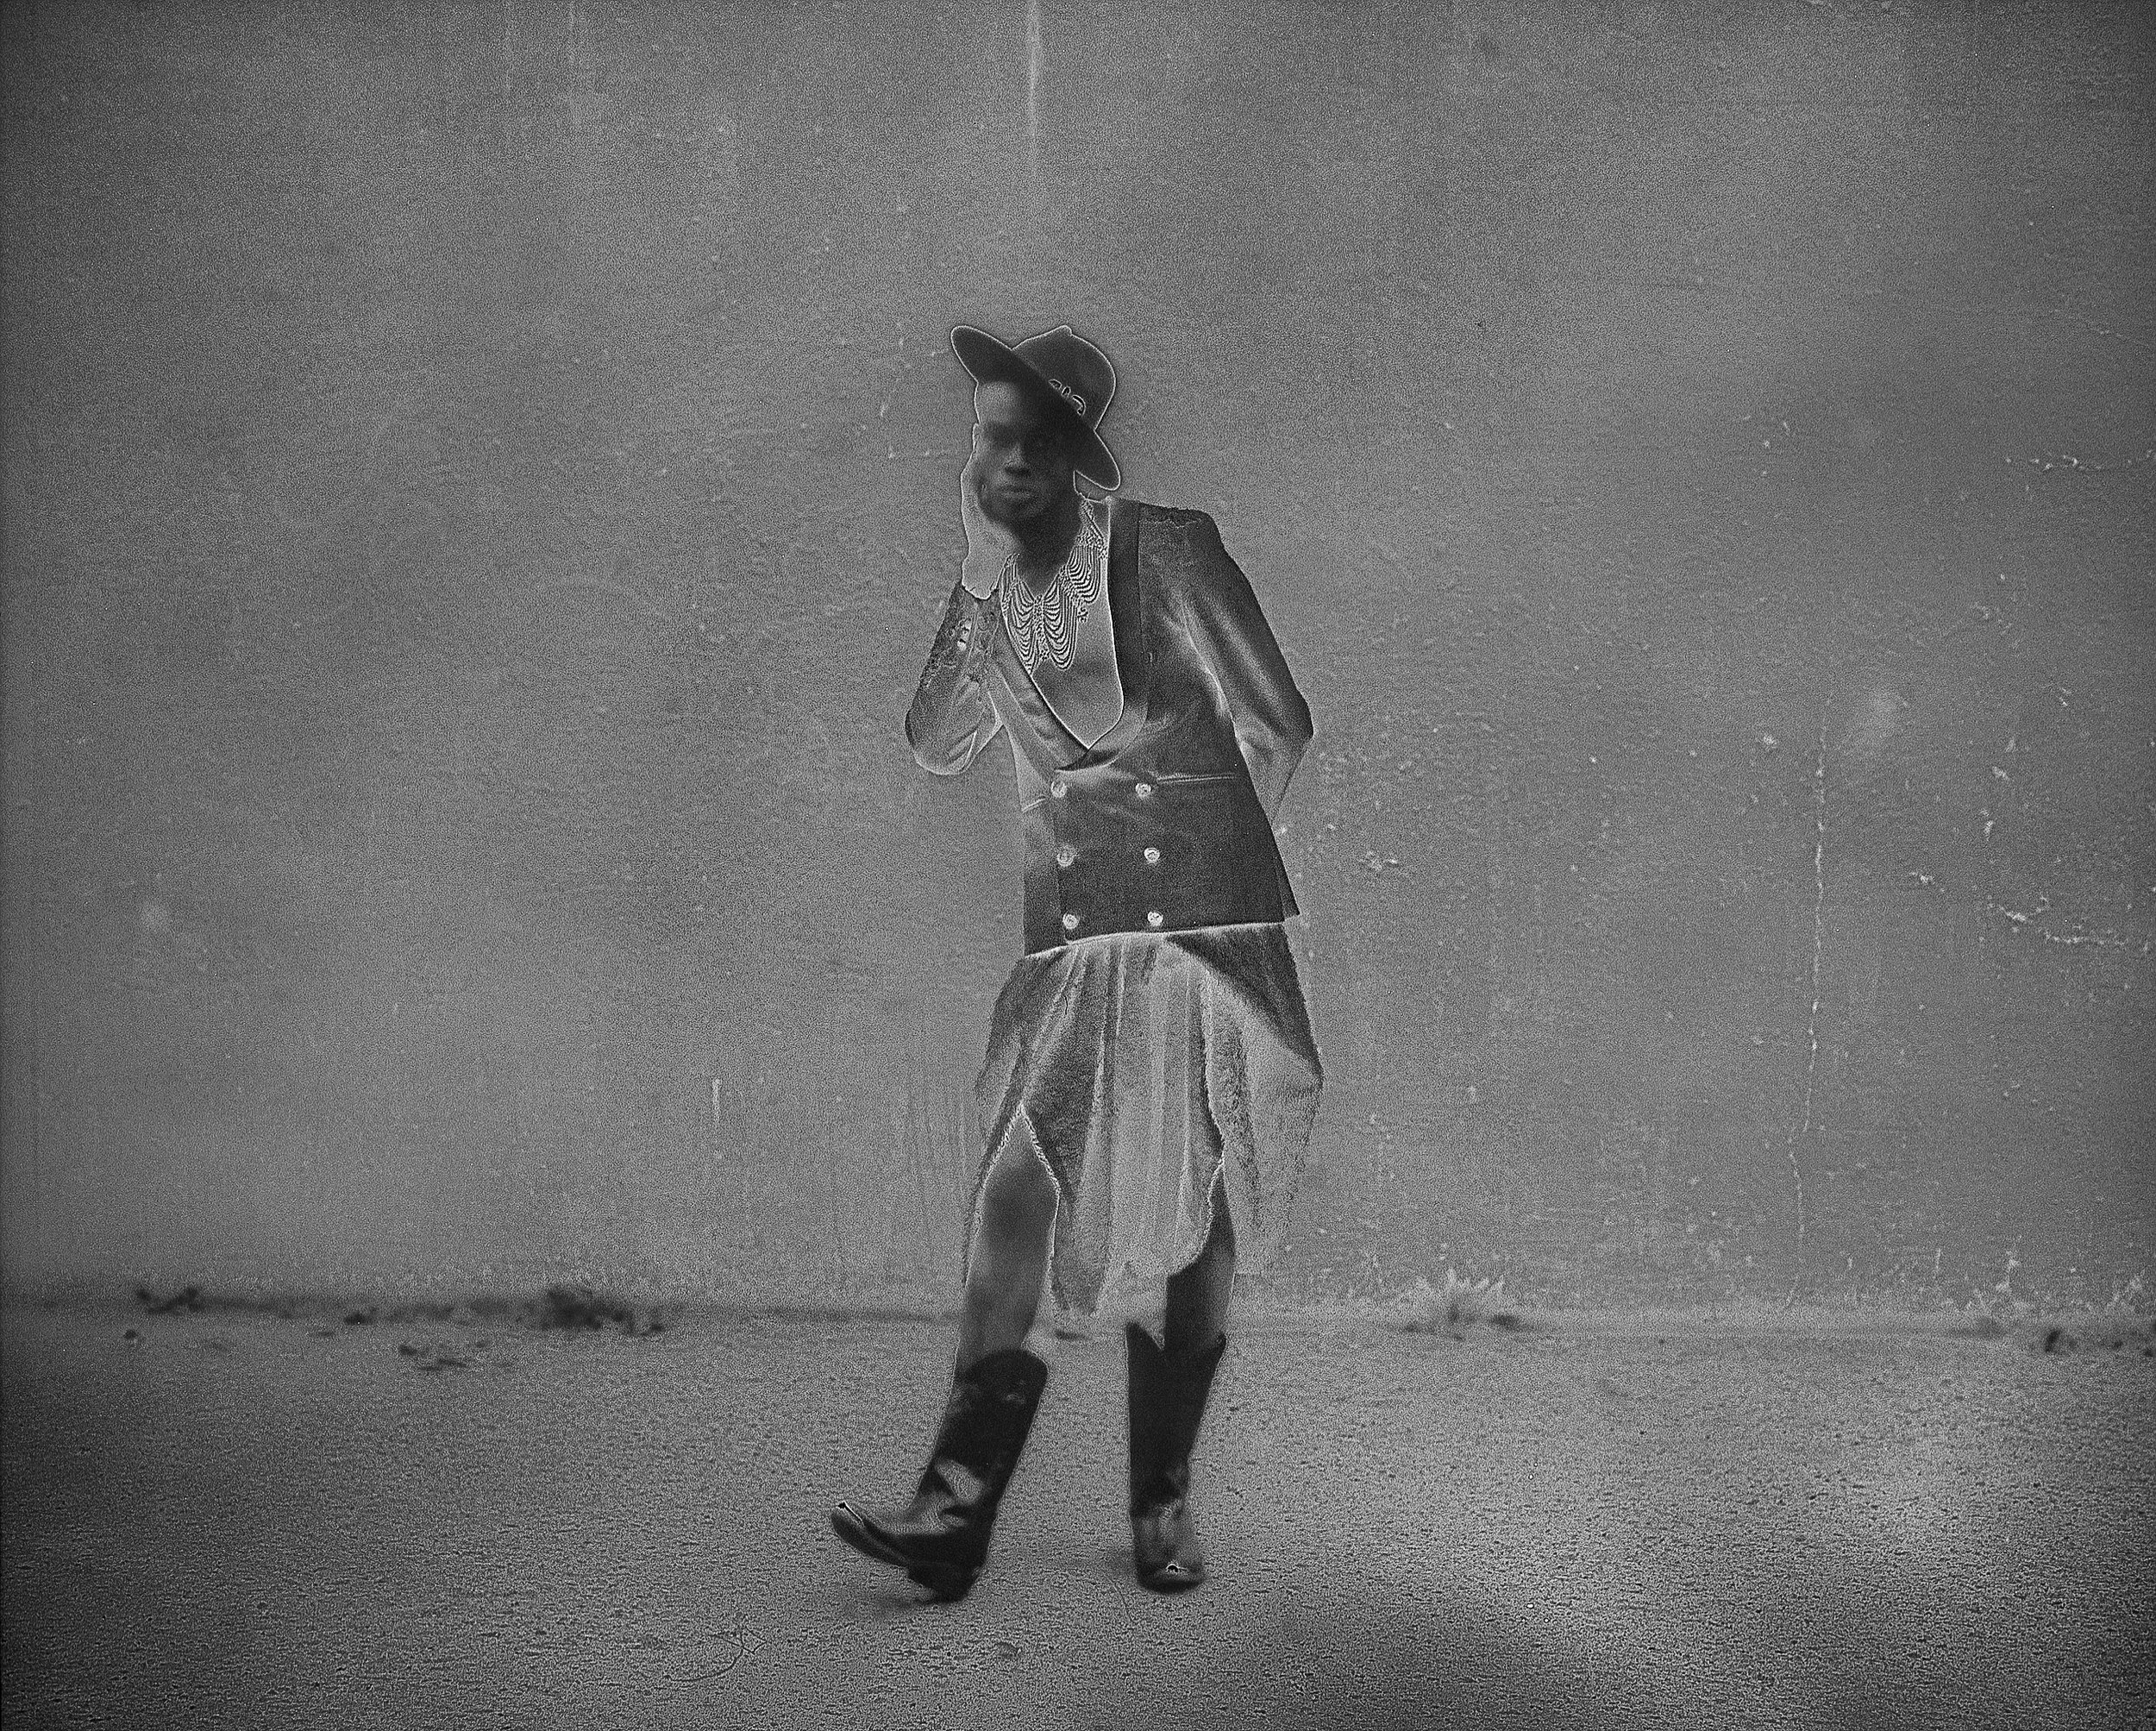
image by John Adams
I searched online for tutorials, but I didn’t come up with much (anything).
But it was fine, because I like to experiment, so I figured I’d just go for it and see what happens.
I shot a whole roll of Ilford HP5 in 35mm, started to develop it, removed it partway to expose it to light (scary!), and kept developing it.
And what happened?
::::::drumroll:::::::::
.
.
.
nothing.
Literally nothing happened.
I took my film out during development, exposed it to light (like you’re not supposed to do, because it’ll utterly RUIN your film), and nothing happened.
Not “nothing” in that it overexposed my film and ruined it all.
“Nothing” in that it developed completely normally, looked great, and didn’t even have so much as a light leak on it.
It wasn’t ruined AT ALL and I was sad.
I admit that having it un-ruined was MORE discouraging than having it totally ruined. So much so, that I tucked the technique away in my brain and said I’d come back to it later, but for years I just didn’t.
Enter Man Ray in The Art Lab.
I’m sure it’s part of the reason I chose Man Ray, because I knew faced with studying him for a month that I would be more likely to get the technique back off my mental Pinterest board and actually try it again.
During one of the group zooms I talked about how I had tried solarization and it didn’t work, and in a true BETTER TOGETHER moment, Kara Boodhansingh dropped the tip I desperately needed.
She was also interested in solarization, and couldn’t find a ton about it online, and as little as their is about it, there’s more about solarizing prints than solarizing film, but she did run into this fact: you will have a hard time solarizing if your developer has hydroquinone.
Guess what developer I use for black and white? Kodak hc-110. Guess what Kodak hc-110 is CHOCK-FULL OF? HYRDRO-FREAKING-QUINONE. (Okay, I don’t actually know if it’s chock-full of it, but it does have it.)
And yes, there are all sorts of black and white developers, but I only have Kodak hc-110 and really wasn’t interested in buying a new developer if I didn’t have to.
I remembered then that one of the things my friend John had done upon receiving his “ruined” film was CONVERT IT TO BLACK AND WHITE. Did this mean c-41 chemicals don’t have hydroquinone? (According to Google AI, they do not. And that research was good enough for me. And I know enough about AI to know that you just don’t type it in again or the answer might change to something you don’t want to hear.)
But I wasn’t solarizing a print (because my enlarger still isn’t set up); I was wanting to solarize my film negatives. Solarizing a print is preferable because you can keep using the same negative and playing with the printing process. Solarizing film meant I had to shoot a whole roll for ever single experiment I wanted to do. The bar was too high.
And if you’ve ever listened to even a single episode of my podcast, you have probably heard me say “lower the bar”.
I say “lower the bar” because sometimes we just overcomplicate things to the point of not wanting to do them anymore. Instead of keeping things so darn complicated, lower the bar to set yourself up for success. We don’t win awards for making life more complicated and cumbersome than it needs to be.
So how was I going to lower the bar here? Similar to using a negative in the darkroom, I could use a picture I had already taken by just photographing it onto fresh film from my computer screen.
I shot about 10 images, took the partial roll and developed it, exposing it to light partway through, finishing as normal, and guess what…..IT WORKED. I got SOLARIZED IMAGES.
And all of that was the preamble before telling you how to do it. The recipe starts here.
The (ridiculously easy) Steps To Solarize Your Film:
I.
Take your images on film
You can do this like a normal person, or you can photograph old images on your computer screen!
When I photograph on a screen, I go to a dark room (Or put a blanket over my head and screen. Less preferable, but does the trick. You just need to block out the ambient light.) Turn your screen to the brightest it will go, and spot meter for a midtone. I end up with settings around f/4.5 and 1/30th of a second for ISO 400 film. You can use a tripod or just hold still. We’re not going for perfection anyway.
Also note: I like using a partial roll, because I wind my film onto a reel to develop, so the inner images don’t get as much light as the outer ones. This means I take about 10 images, put my camera in the changing bag, splice off the film I had taken to put into the developing tank, and then I can cut a new leader and reload the film back into the camera for later use.
II.
Develop your film
Important: use developer without hydroquinone. My Cinestill cs41 chemicals work great for this.
Literally just develop as normal and then stop about partway through the process.
Since color film develops for 3.5 minutes, I stop 2 minutes in, remove the film from the tank, and spin it a few feet away from a dim lightbulb for about 7 seconds (I spin it to try to evenly expose the film to light).
I then replace the film into the tank and develop for the remaining 1.5 minutes. Then I blix, rinse, and photo flo as normal.
III.
Scan Your Film
This is maybe my favorite part. Because as I said, solarization creates a tone reversal, you end up with an image that has become partially negative/partially positive. So you can scan this image as a negative and as a positive and get opposite results.
We most often work with film negatives. Normally you scan your negatives and the software converts the film to a positive.
The alternative to film negatives are what we call slide film. Slide film is positive, which means when you look at the strip of film you see the image itself. This is why it could be used in projectors—no conversion needed.
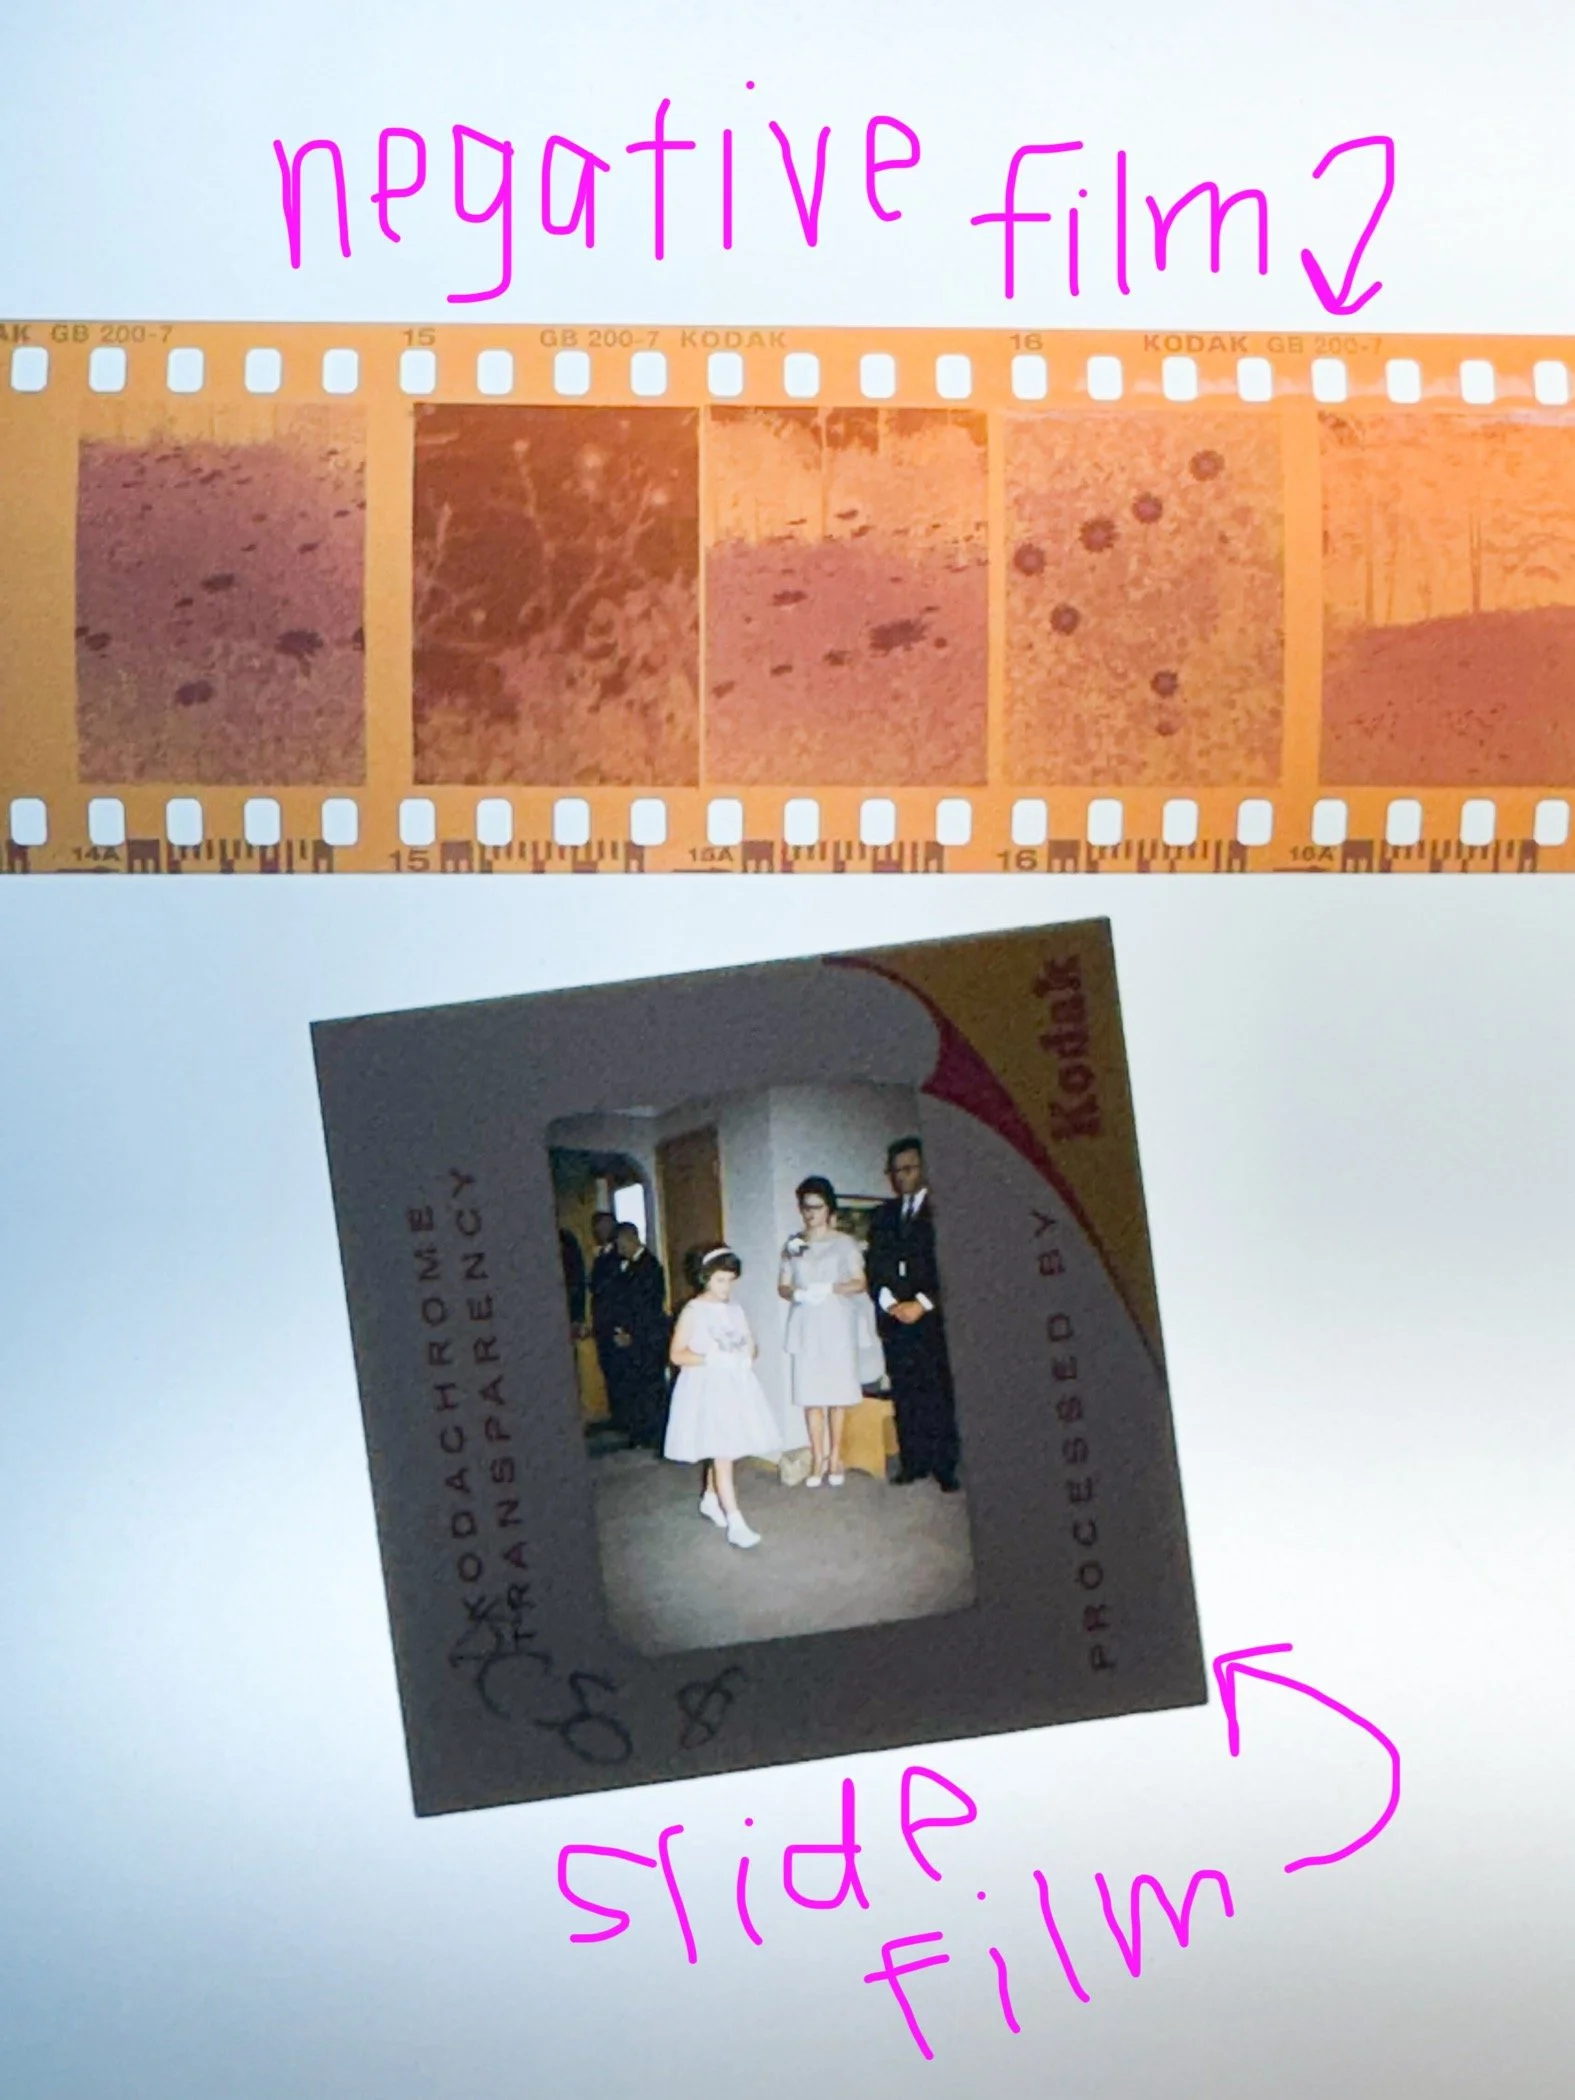
If you scan your film as a negative and do conversion, you will get the opposite result as when you scan your film as a positive (or don’t do a converstion. If you use a program like Negative Lab Pro, you can simply not run the program and work with the scan itself)
I highly recommend scanning as a negative AND a positive to see what happens. Not all images work well both ways, but some do. (especially images where I used a colored lighting source, because the colors were already surreal.)
Then you can convert them to black and white and now you have FOUR images out of the one you took (five if you include the original).
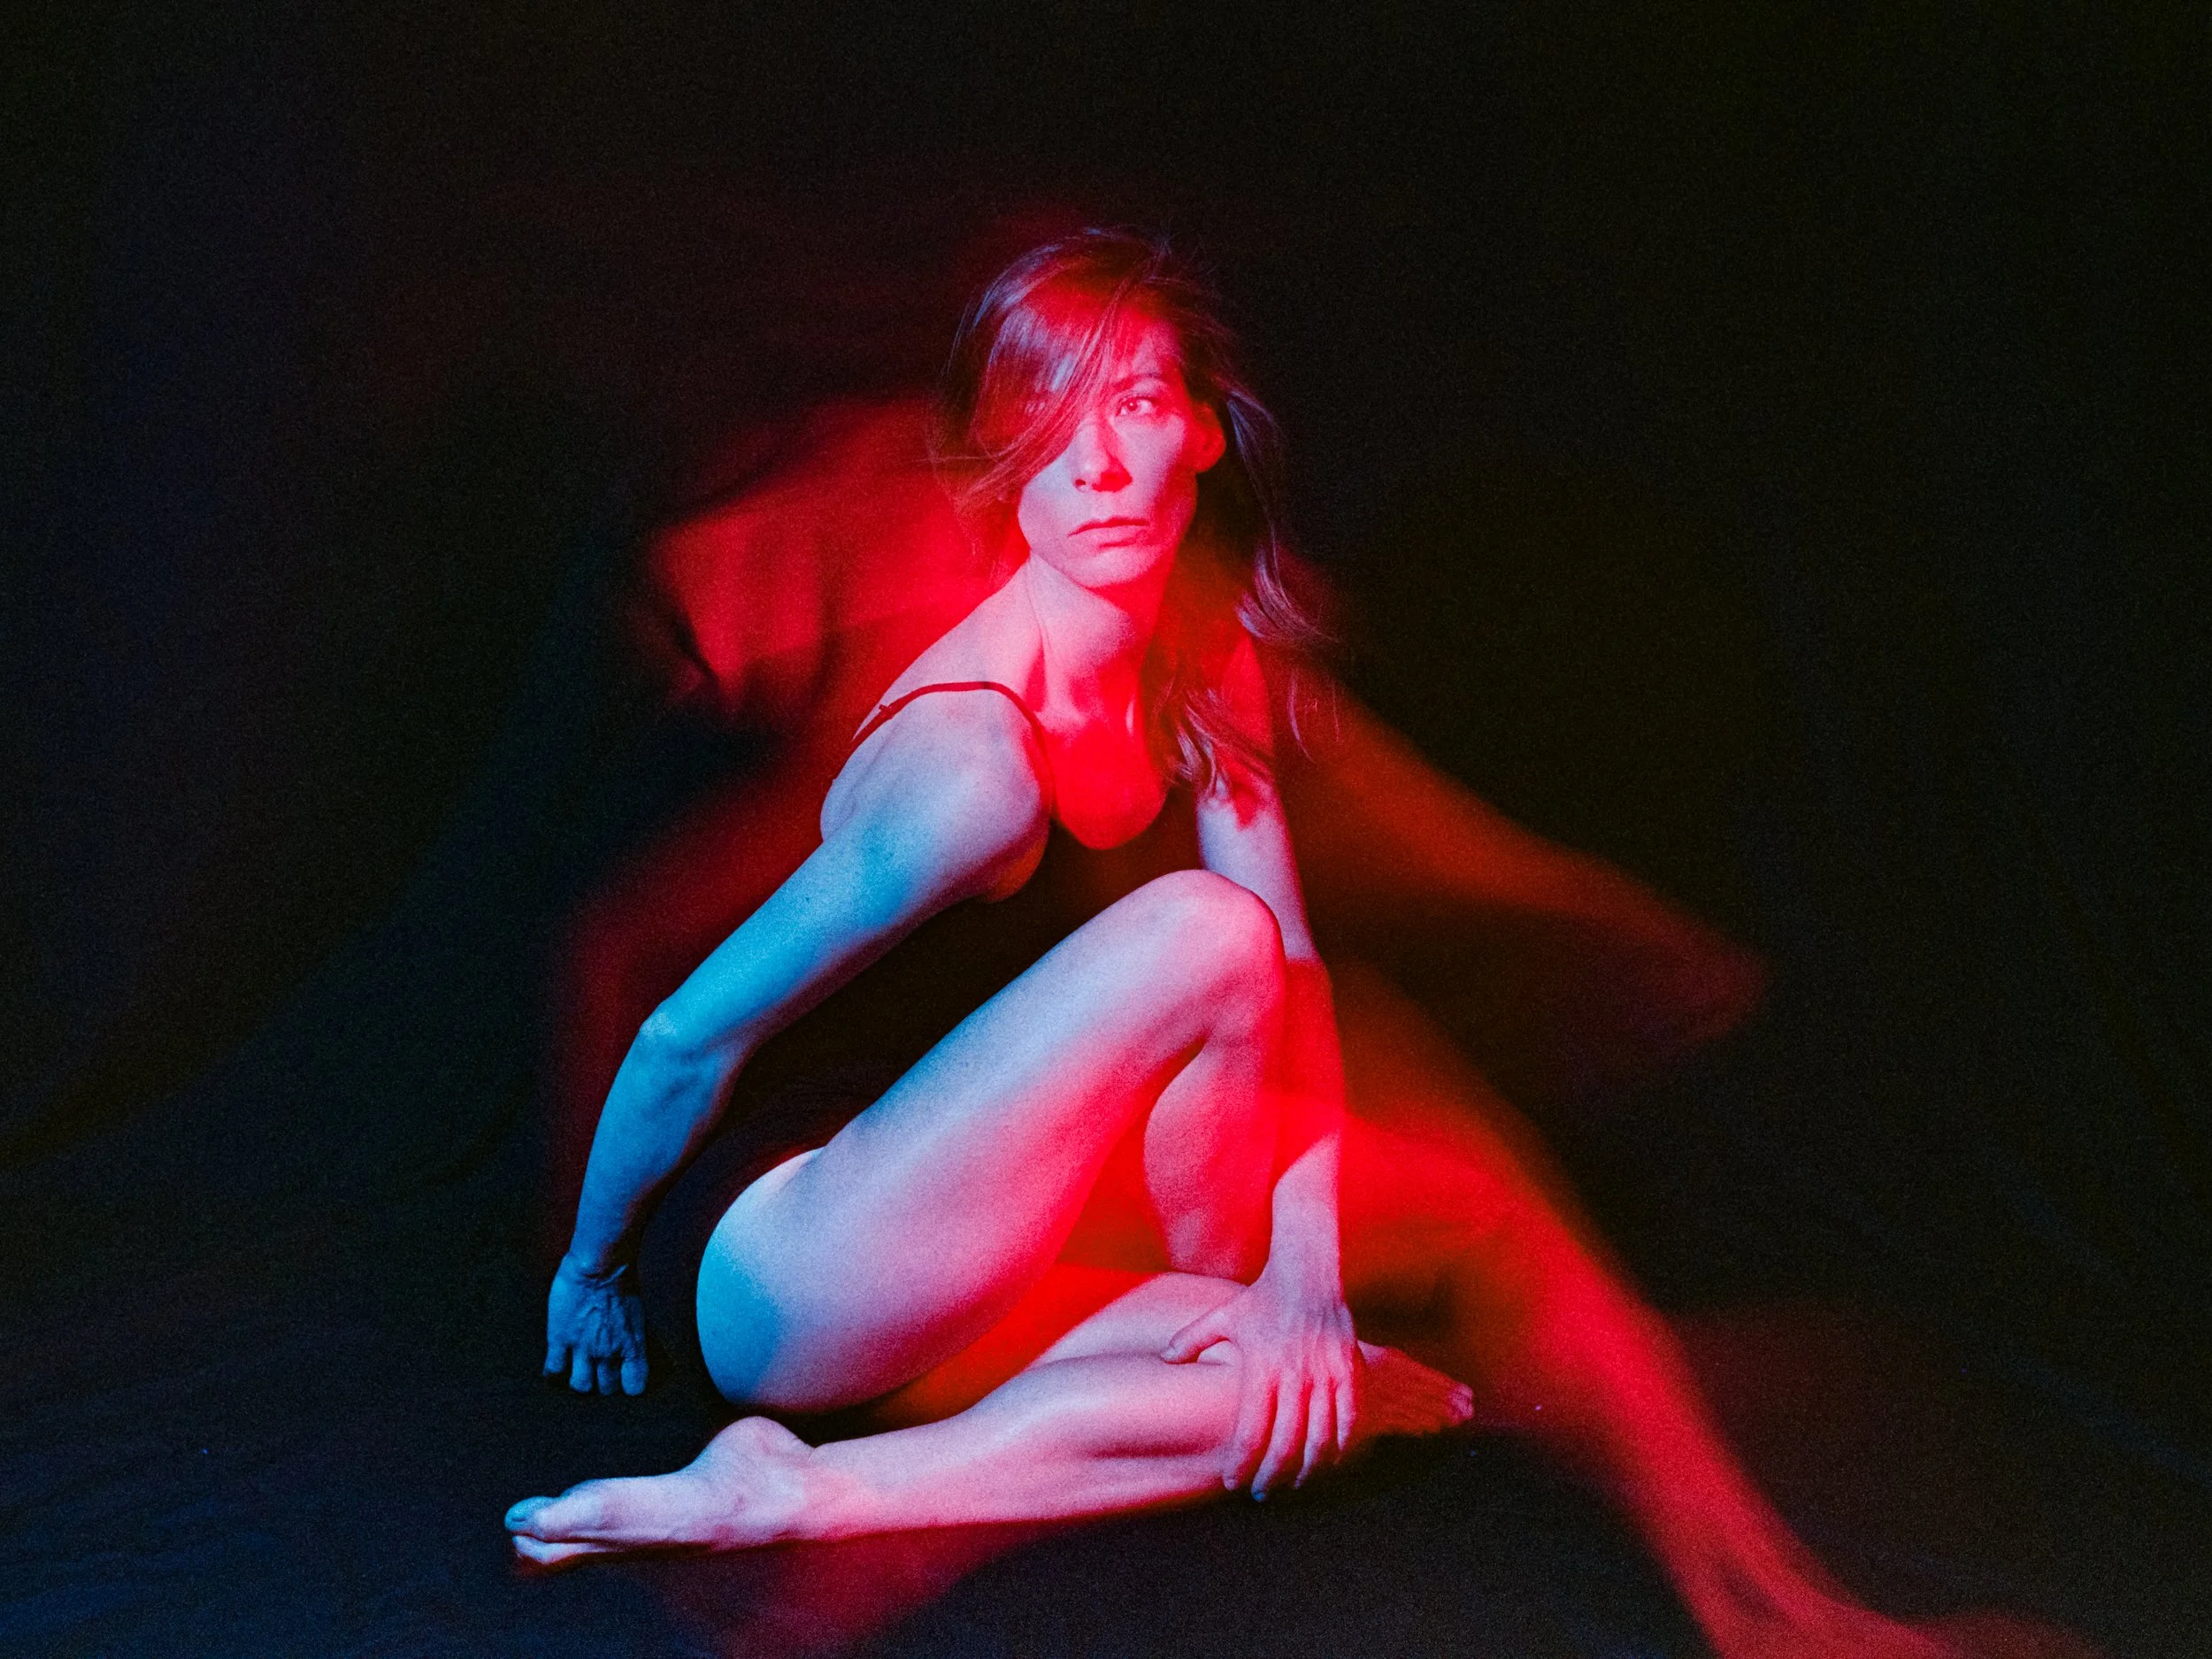
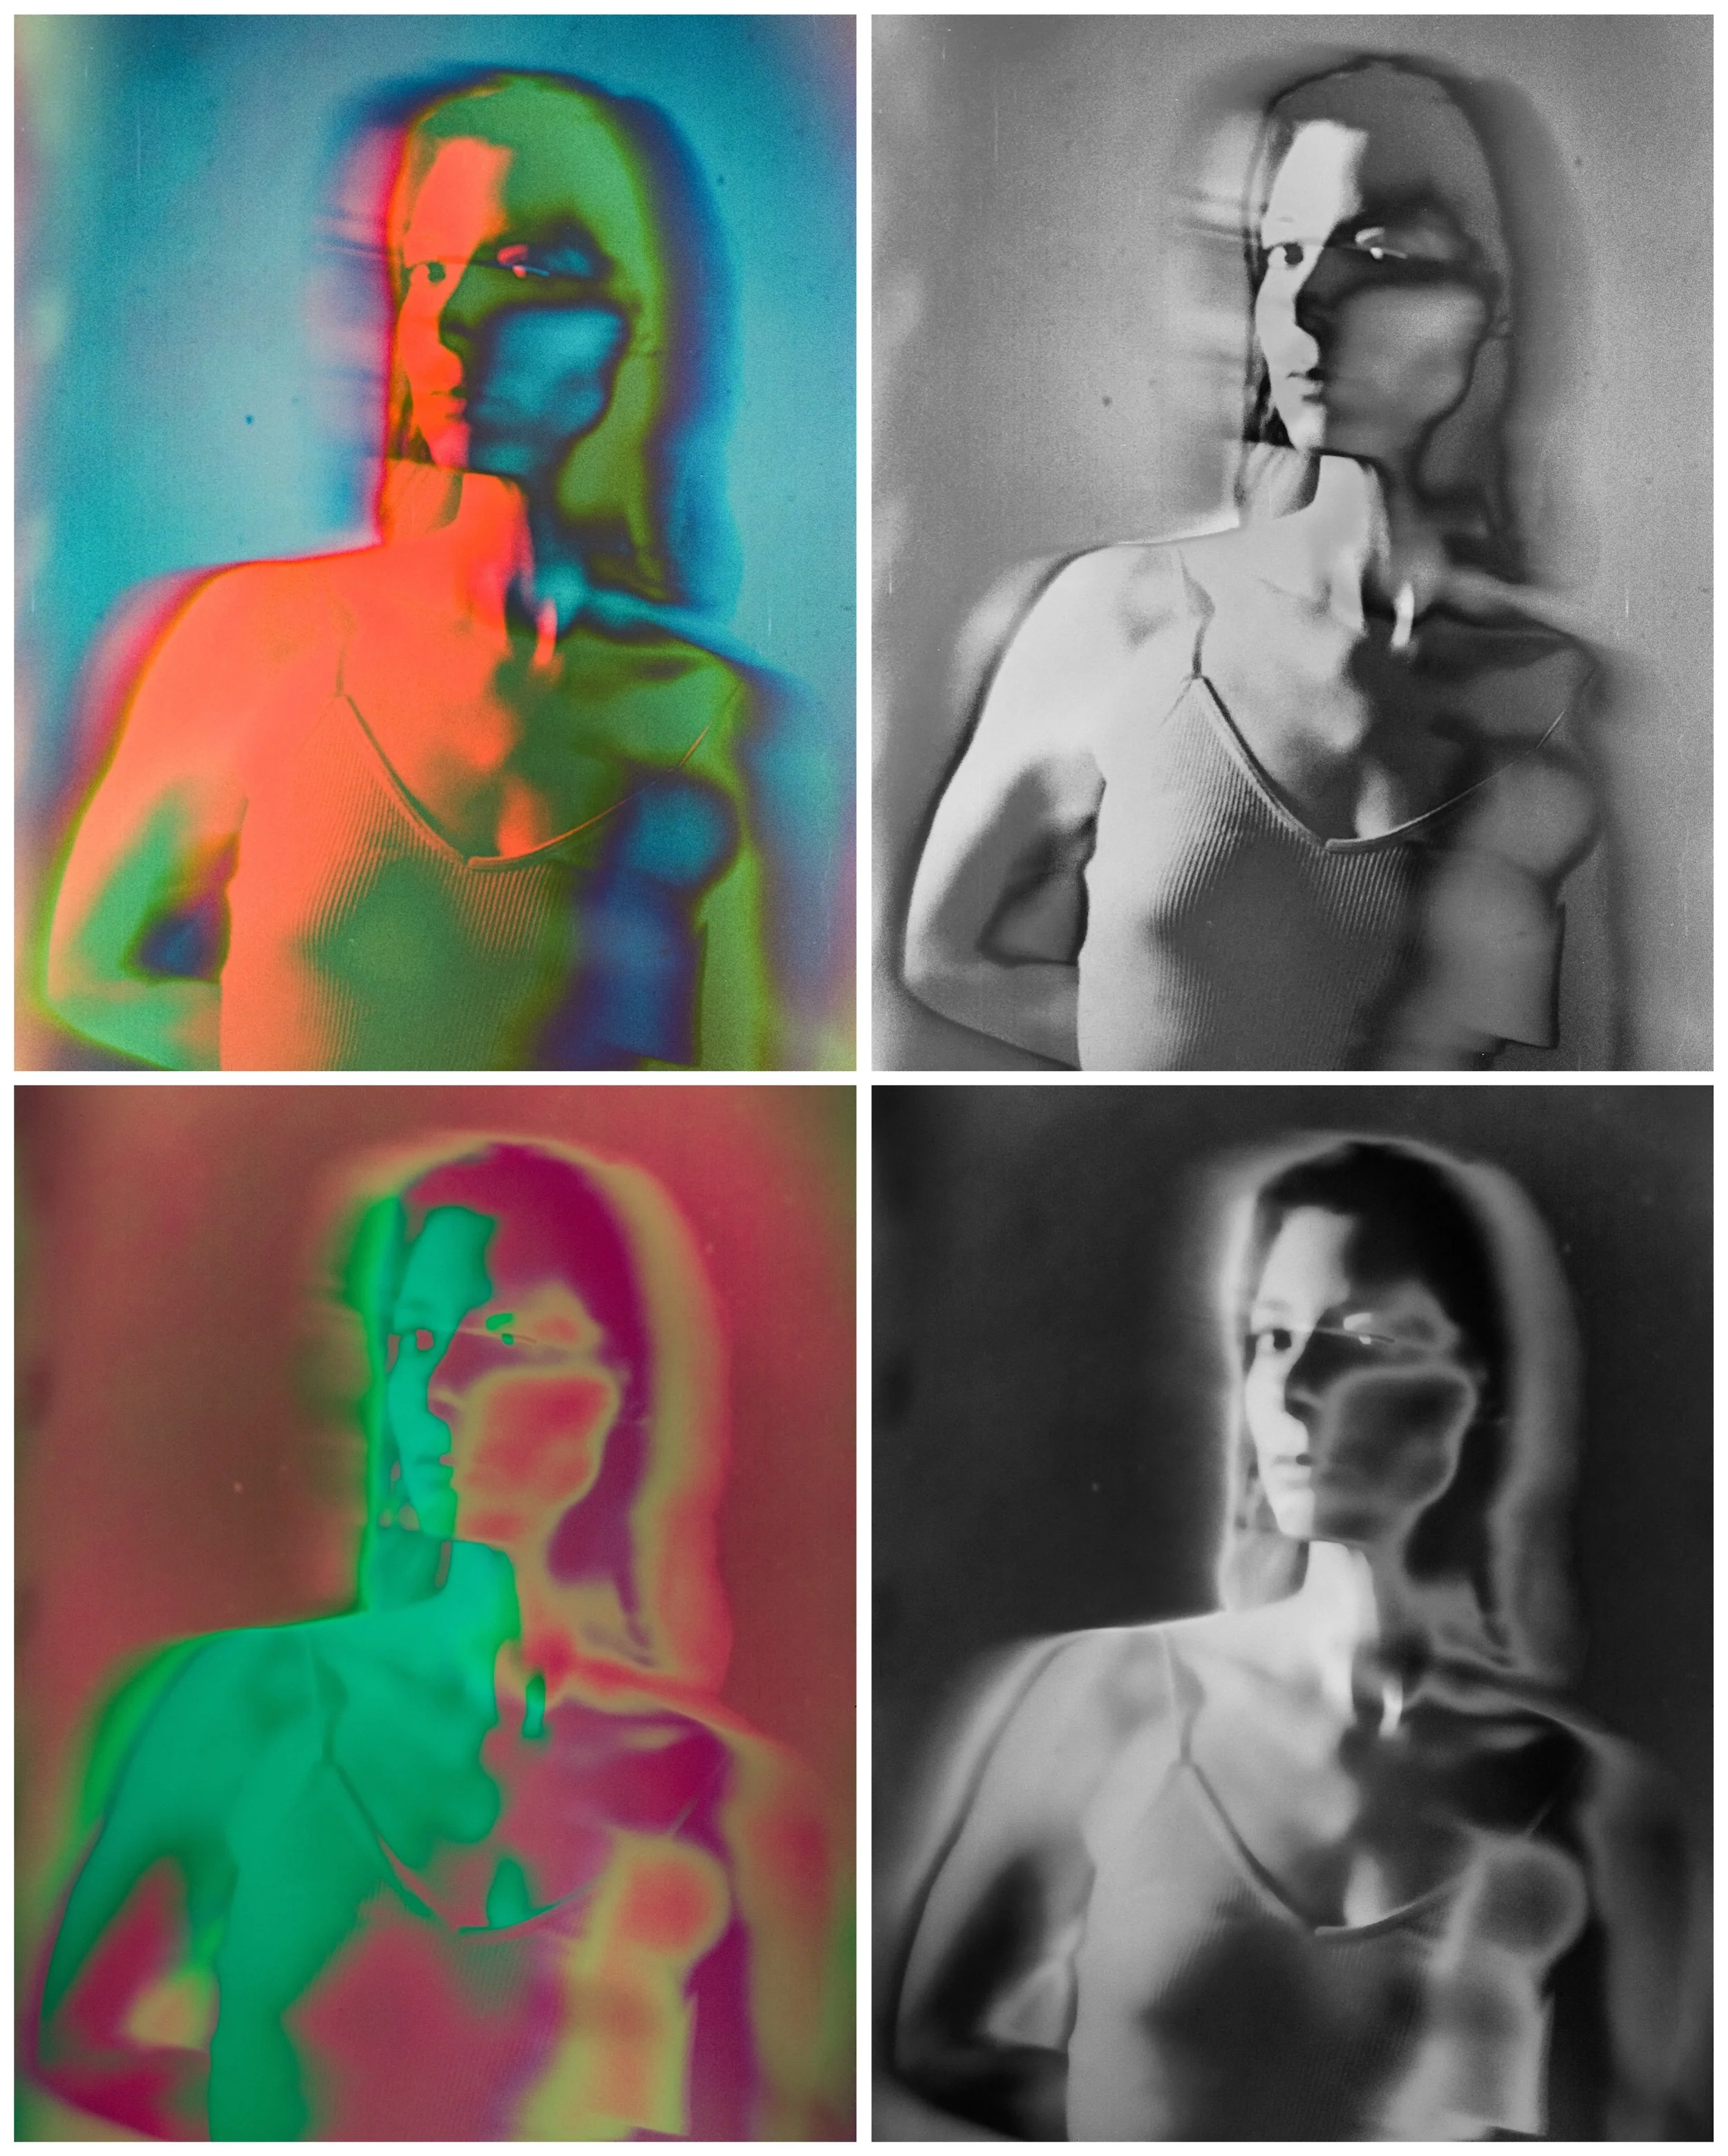
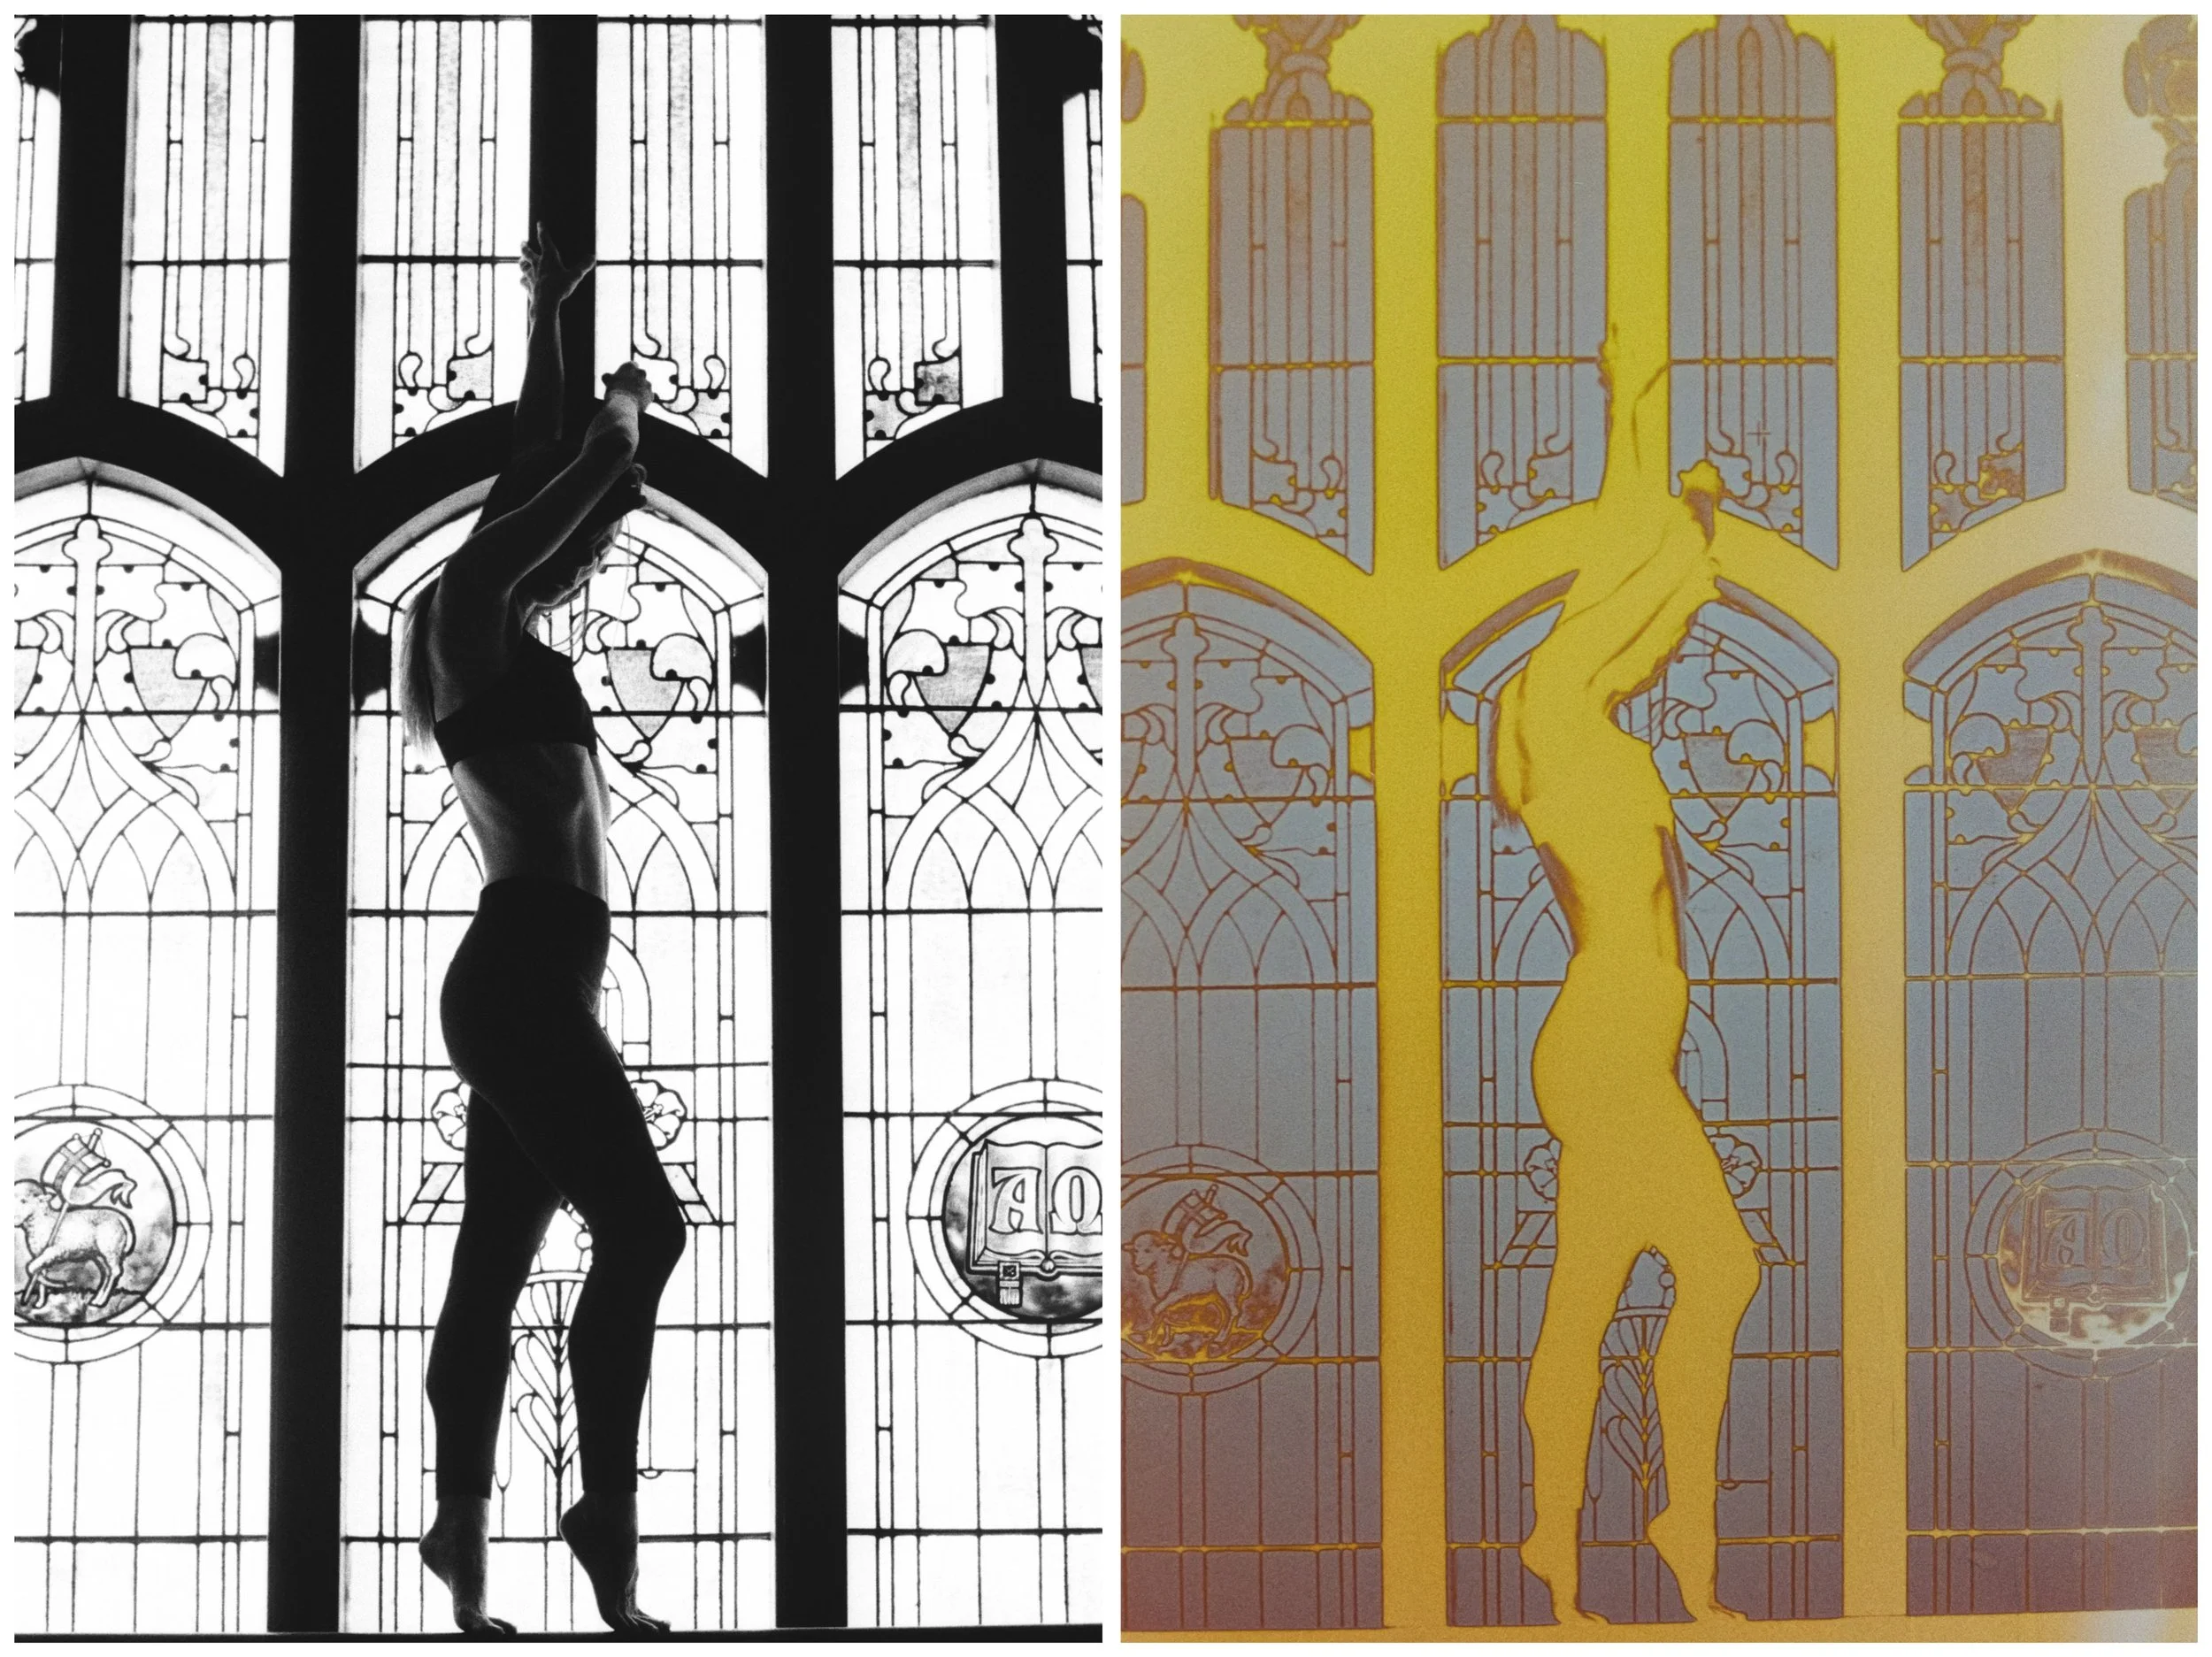
original image above, solarized images below
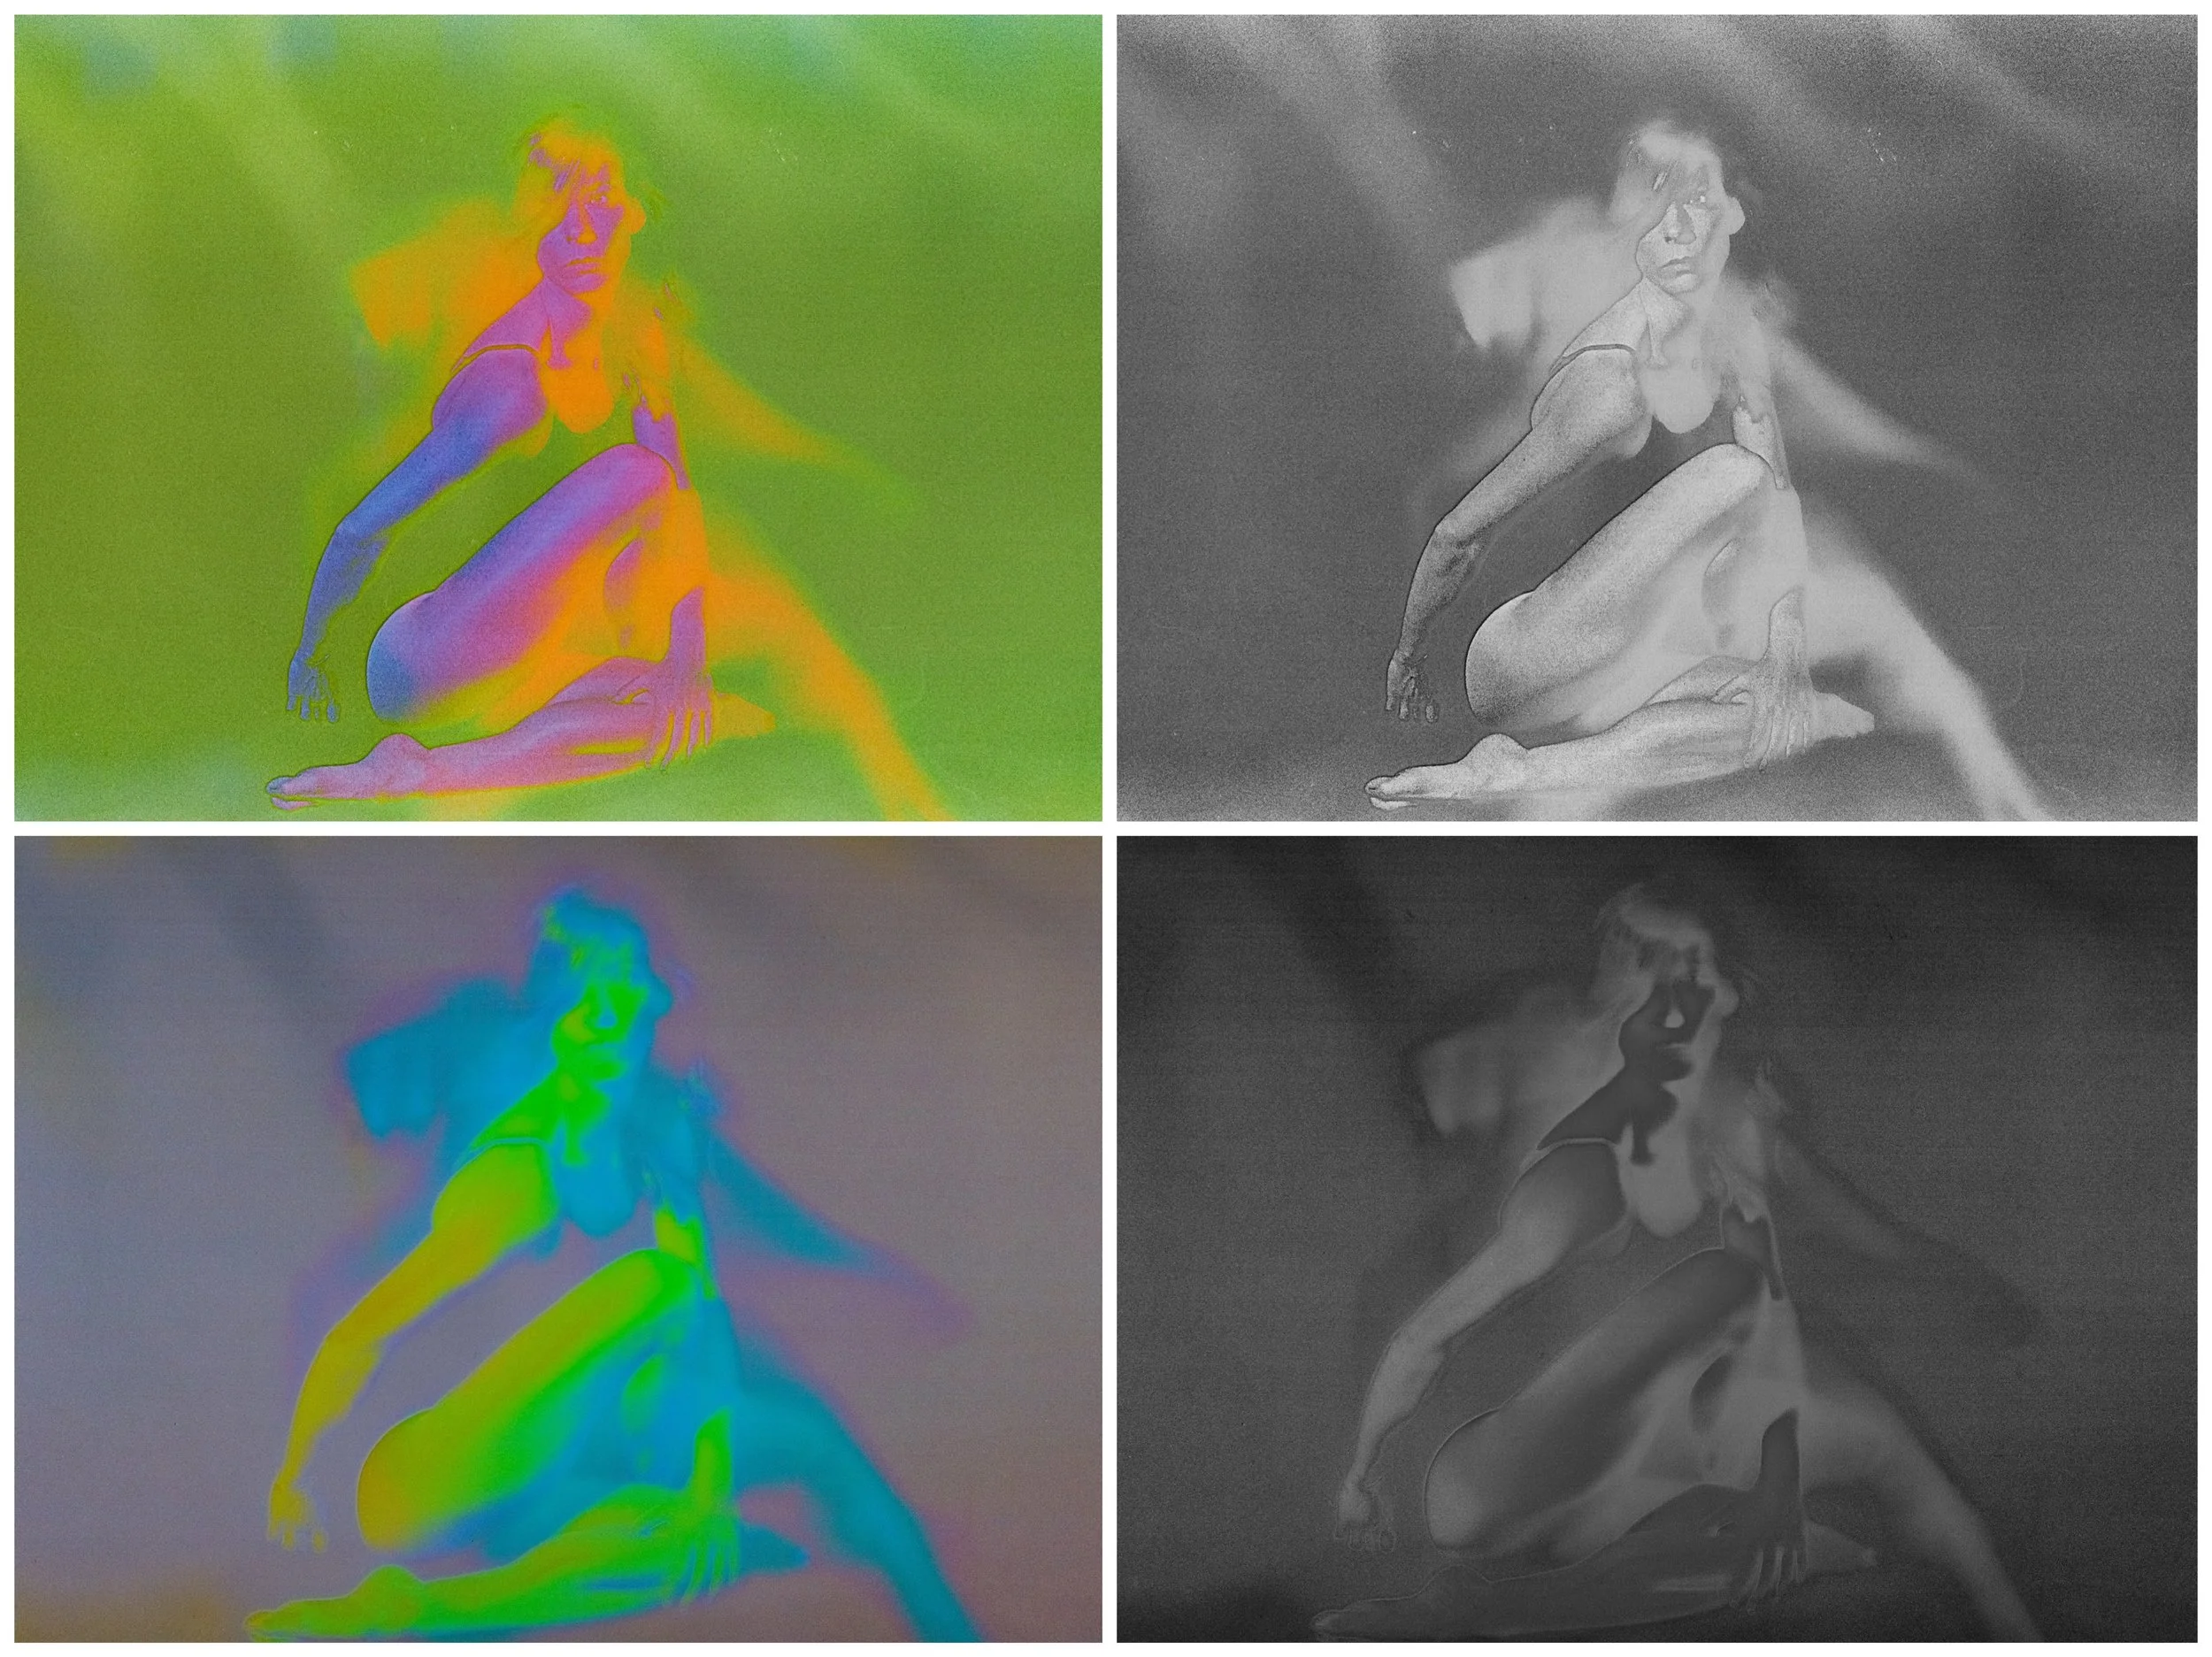
top row: scanned as a negative in color and then converted to black and white
bottom row: scanned as a positive in color and then converted to black and white
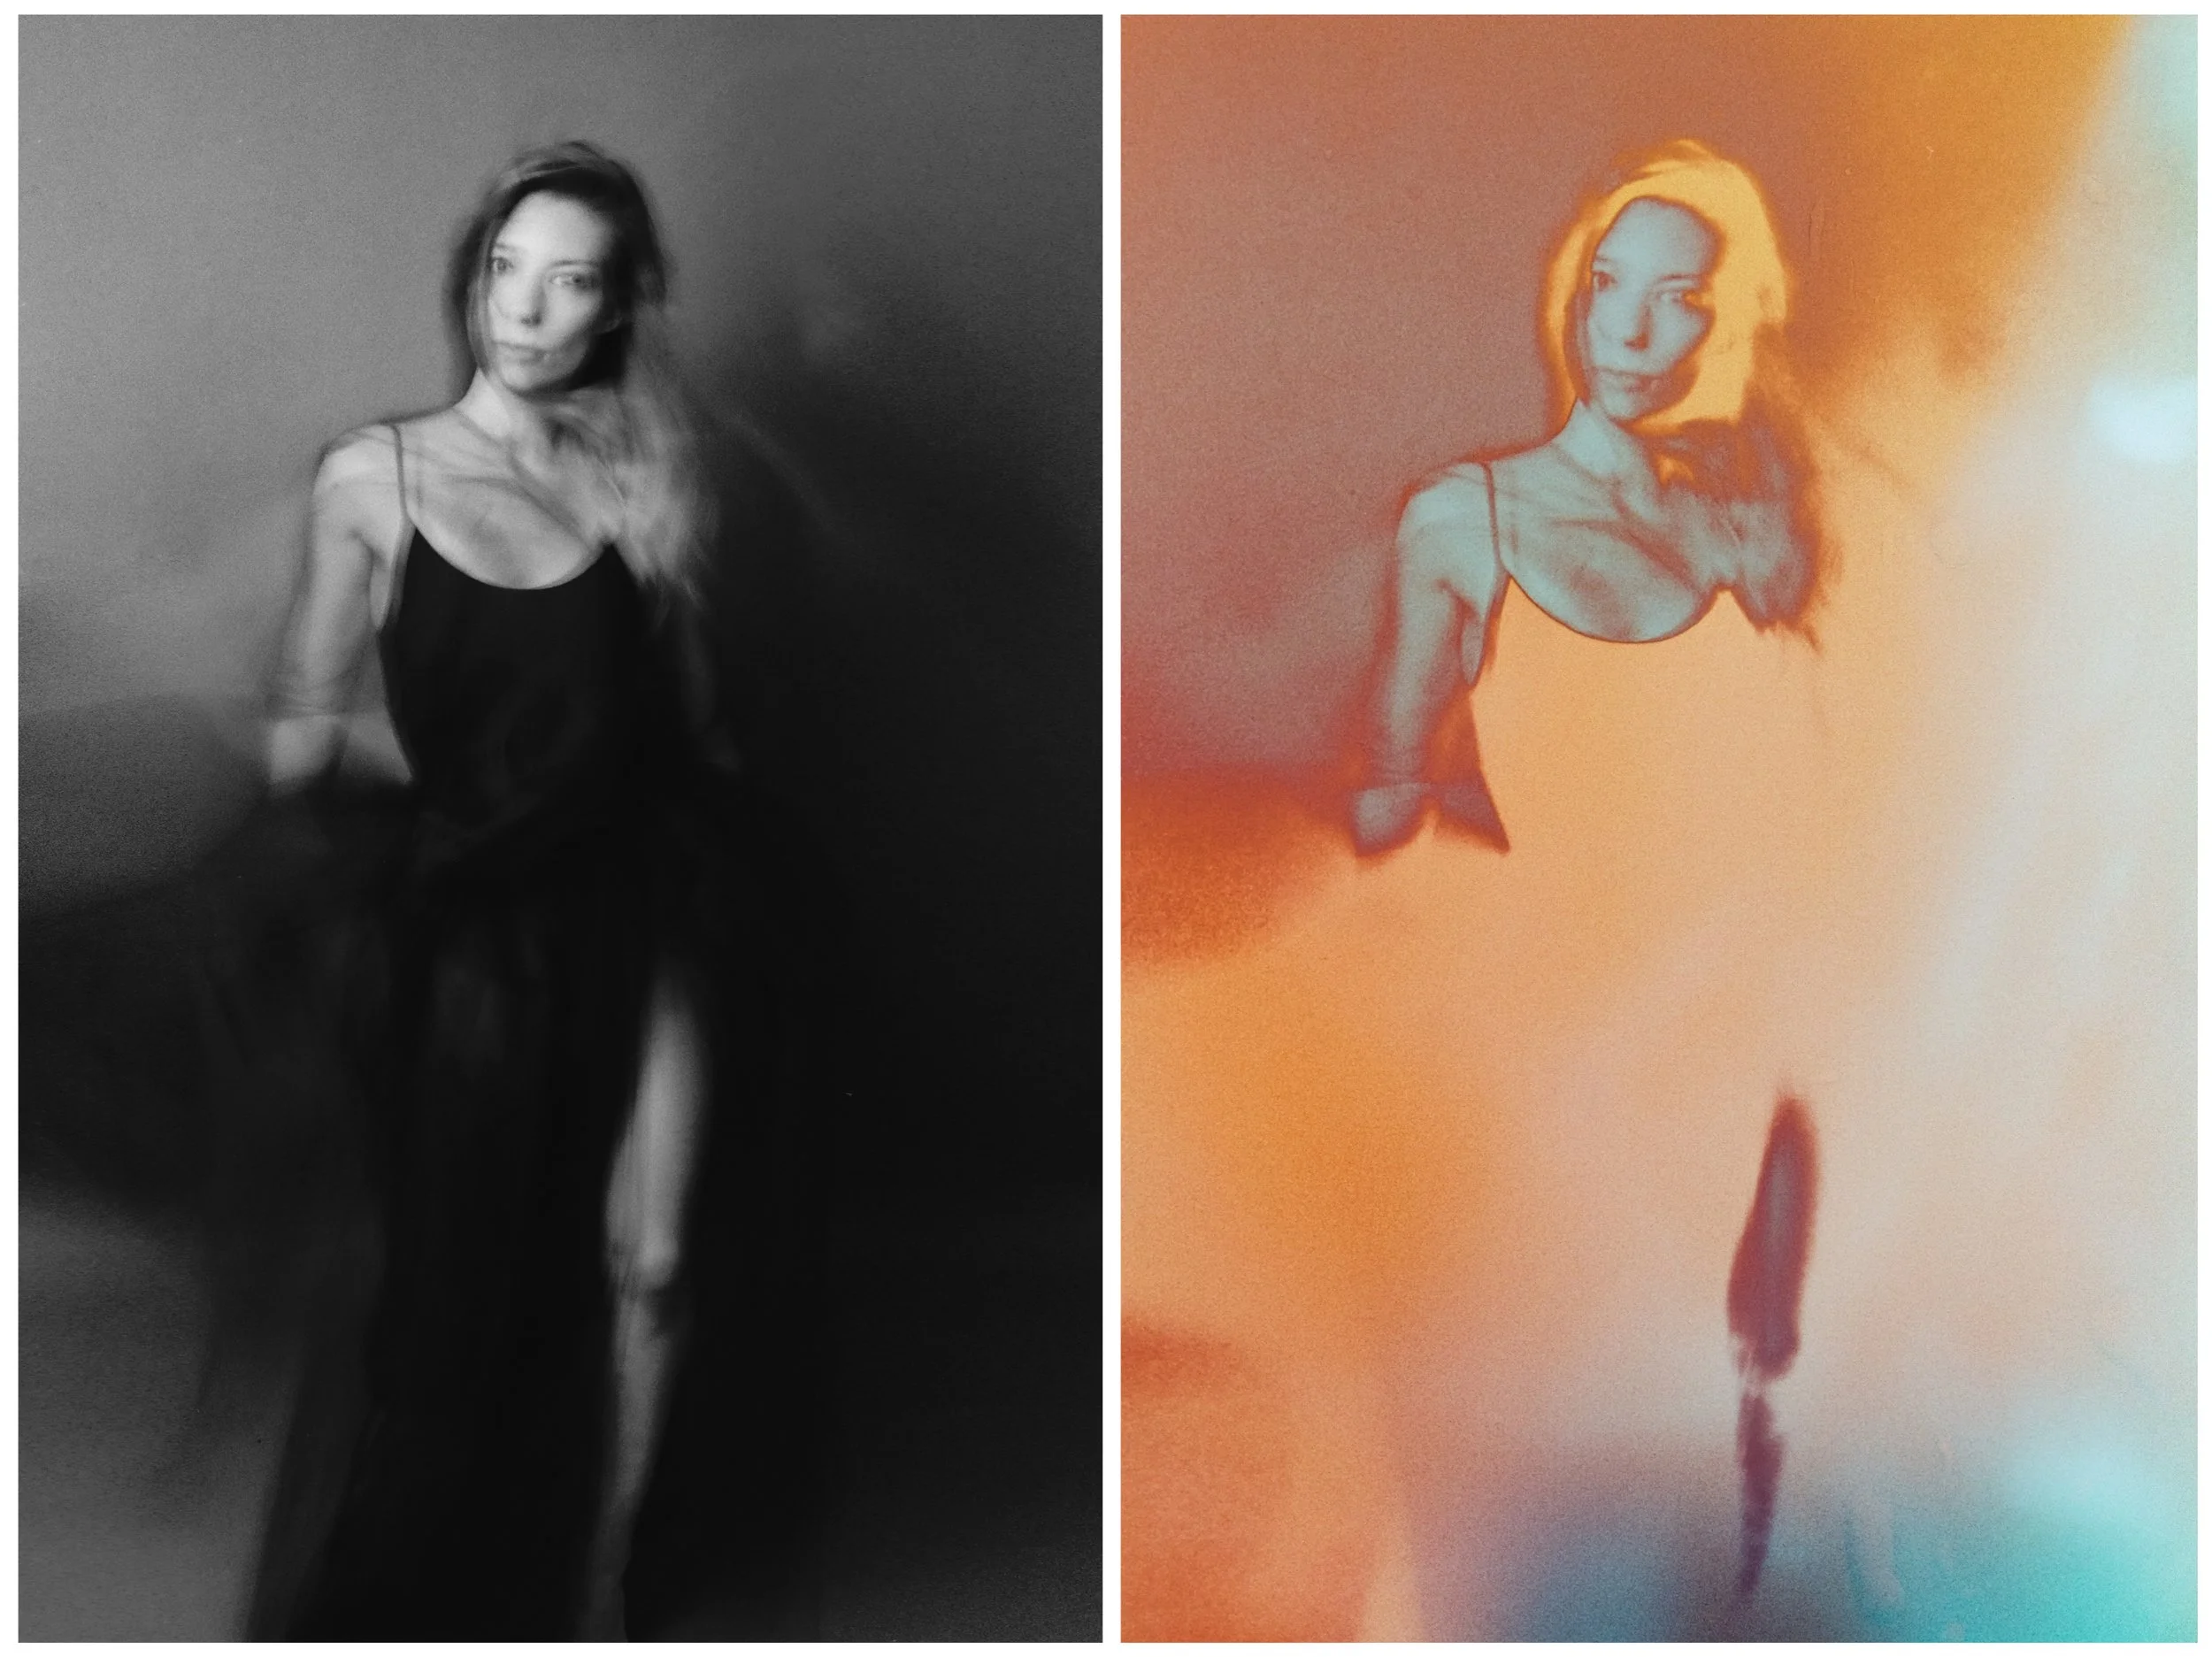
original image above, solarized images below
top row: scanned as a negative in color and then converted to black and white
bottom row: scanned as a positive in color and then converted to black and white
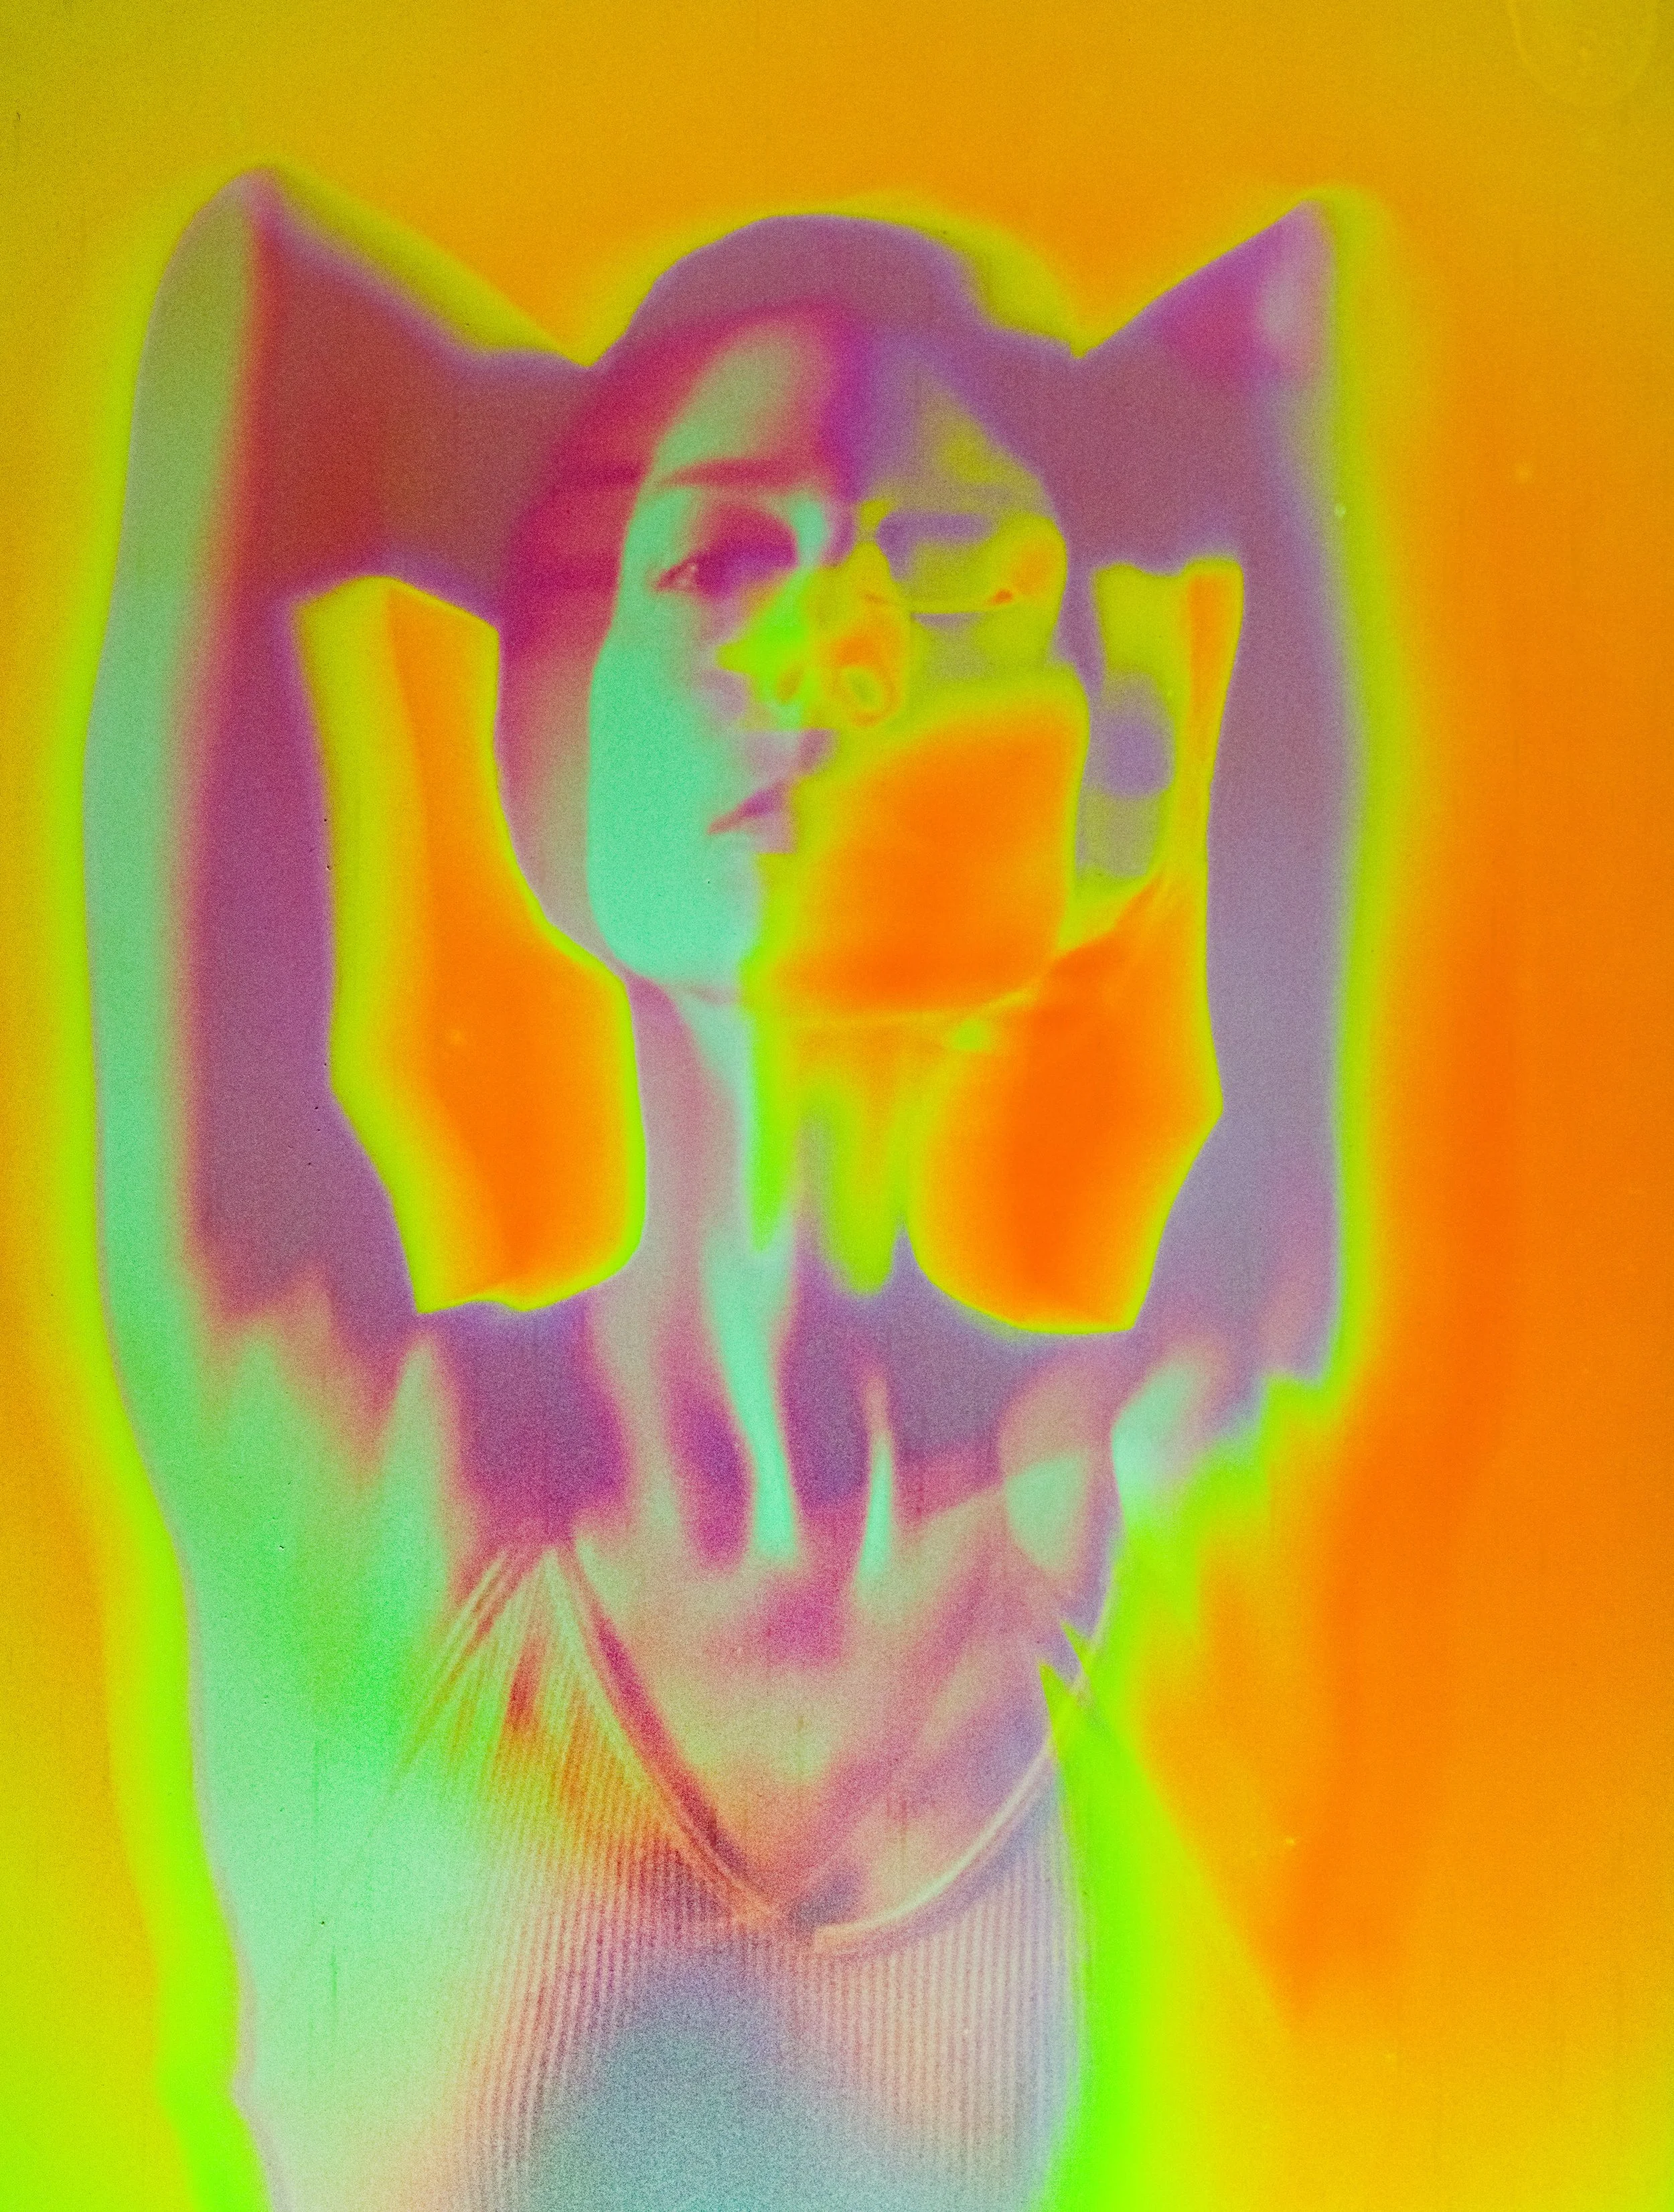
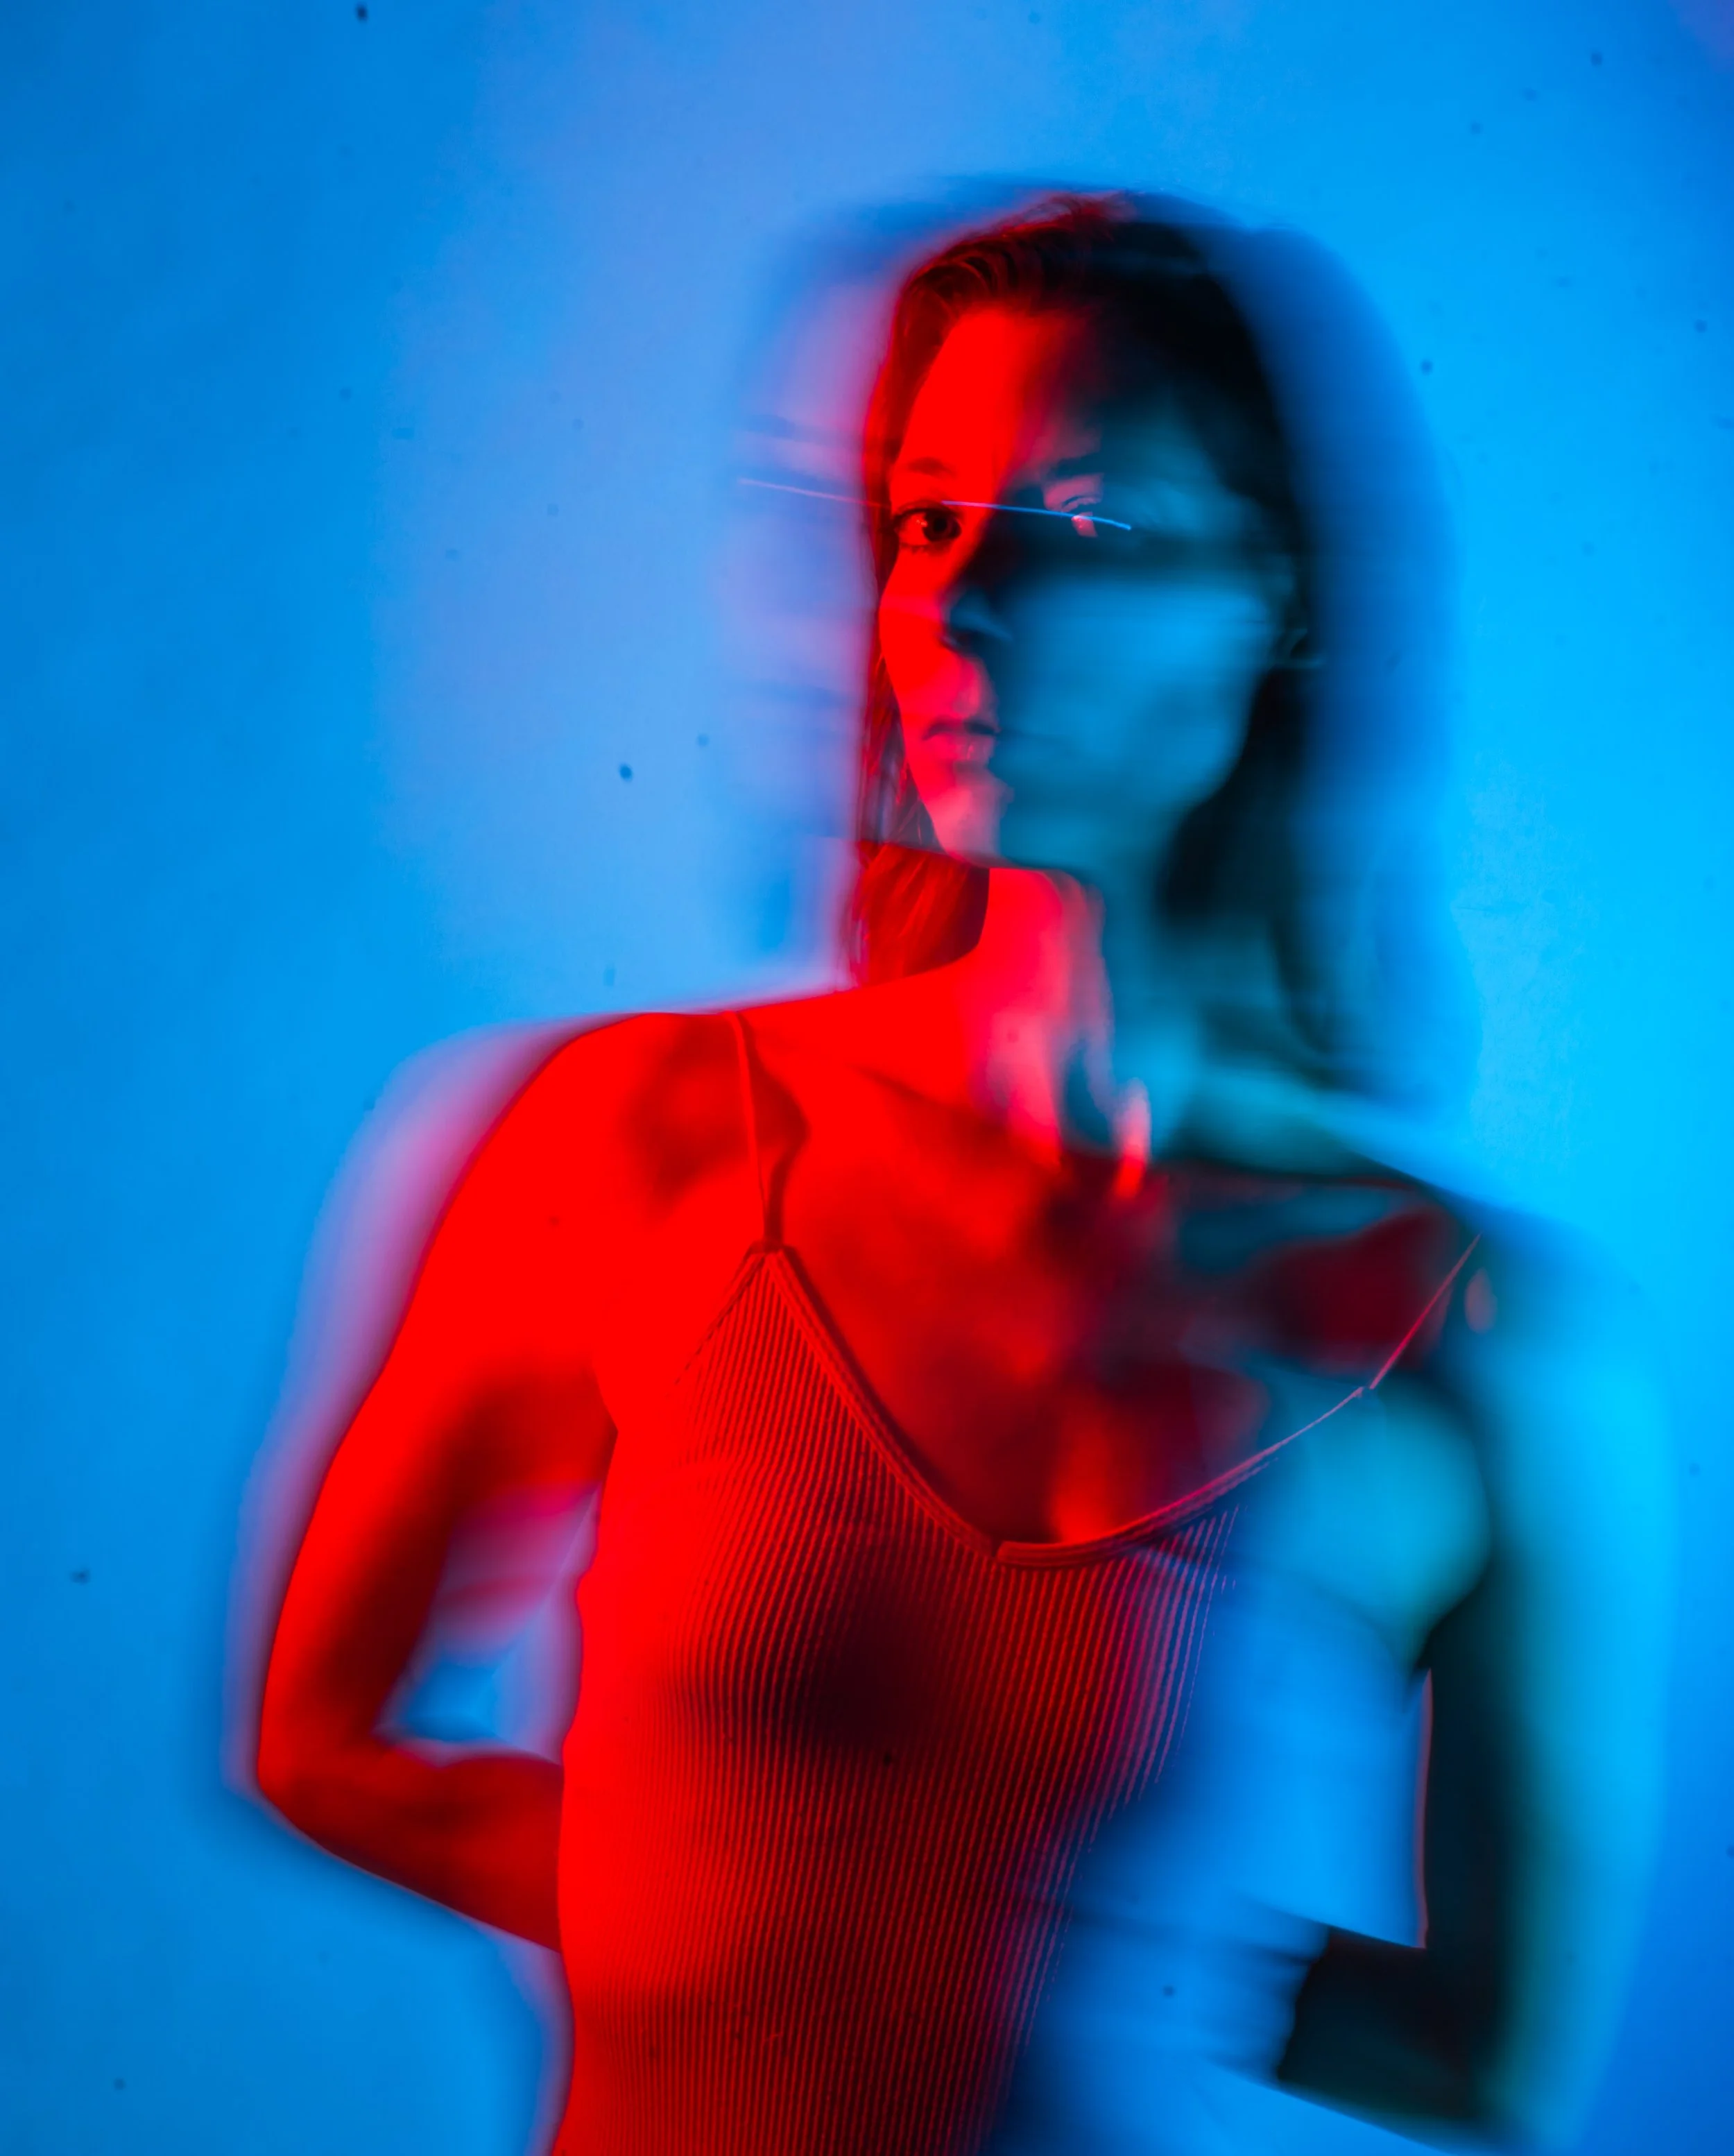
You can also just scan your film normally and see what happens. I have found skin tones often keep their color, while the blacks go to various shades of a bright color. This makes it almost like the subject has been pasted onto a surreal background, adding to the trippy effect. (keep in mind these are photos of a screen, so the quality and colors aren’t nearly as good as the original)
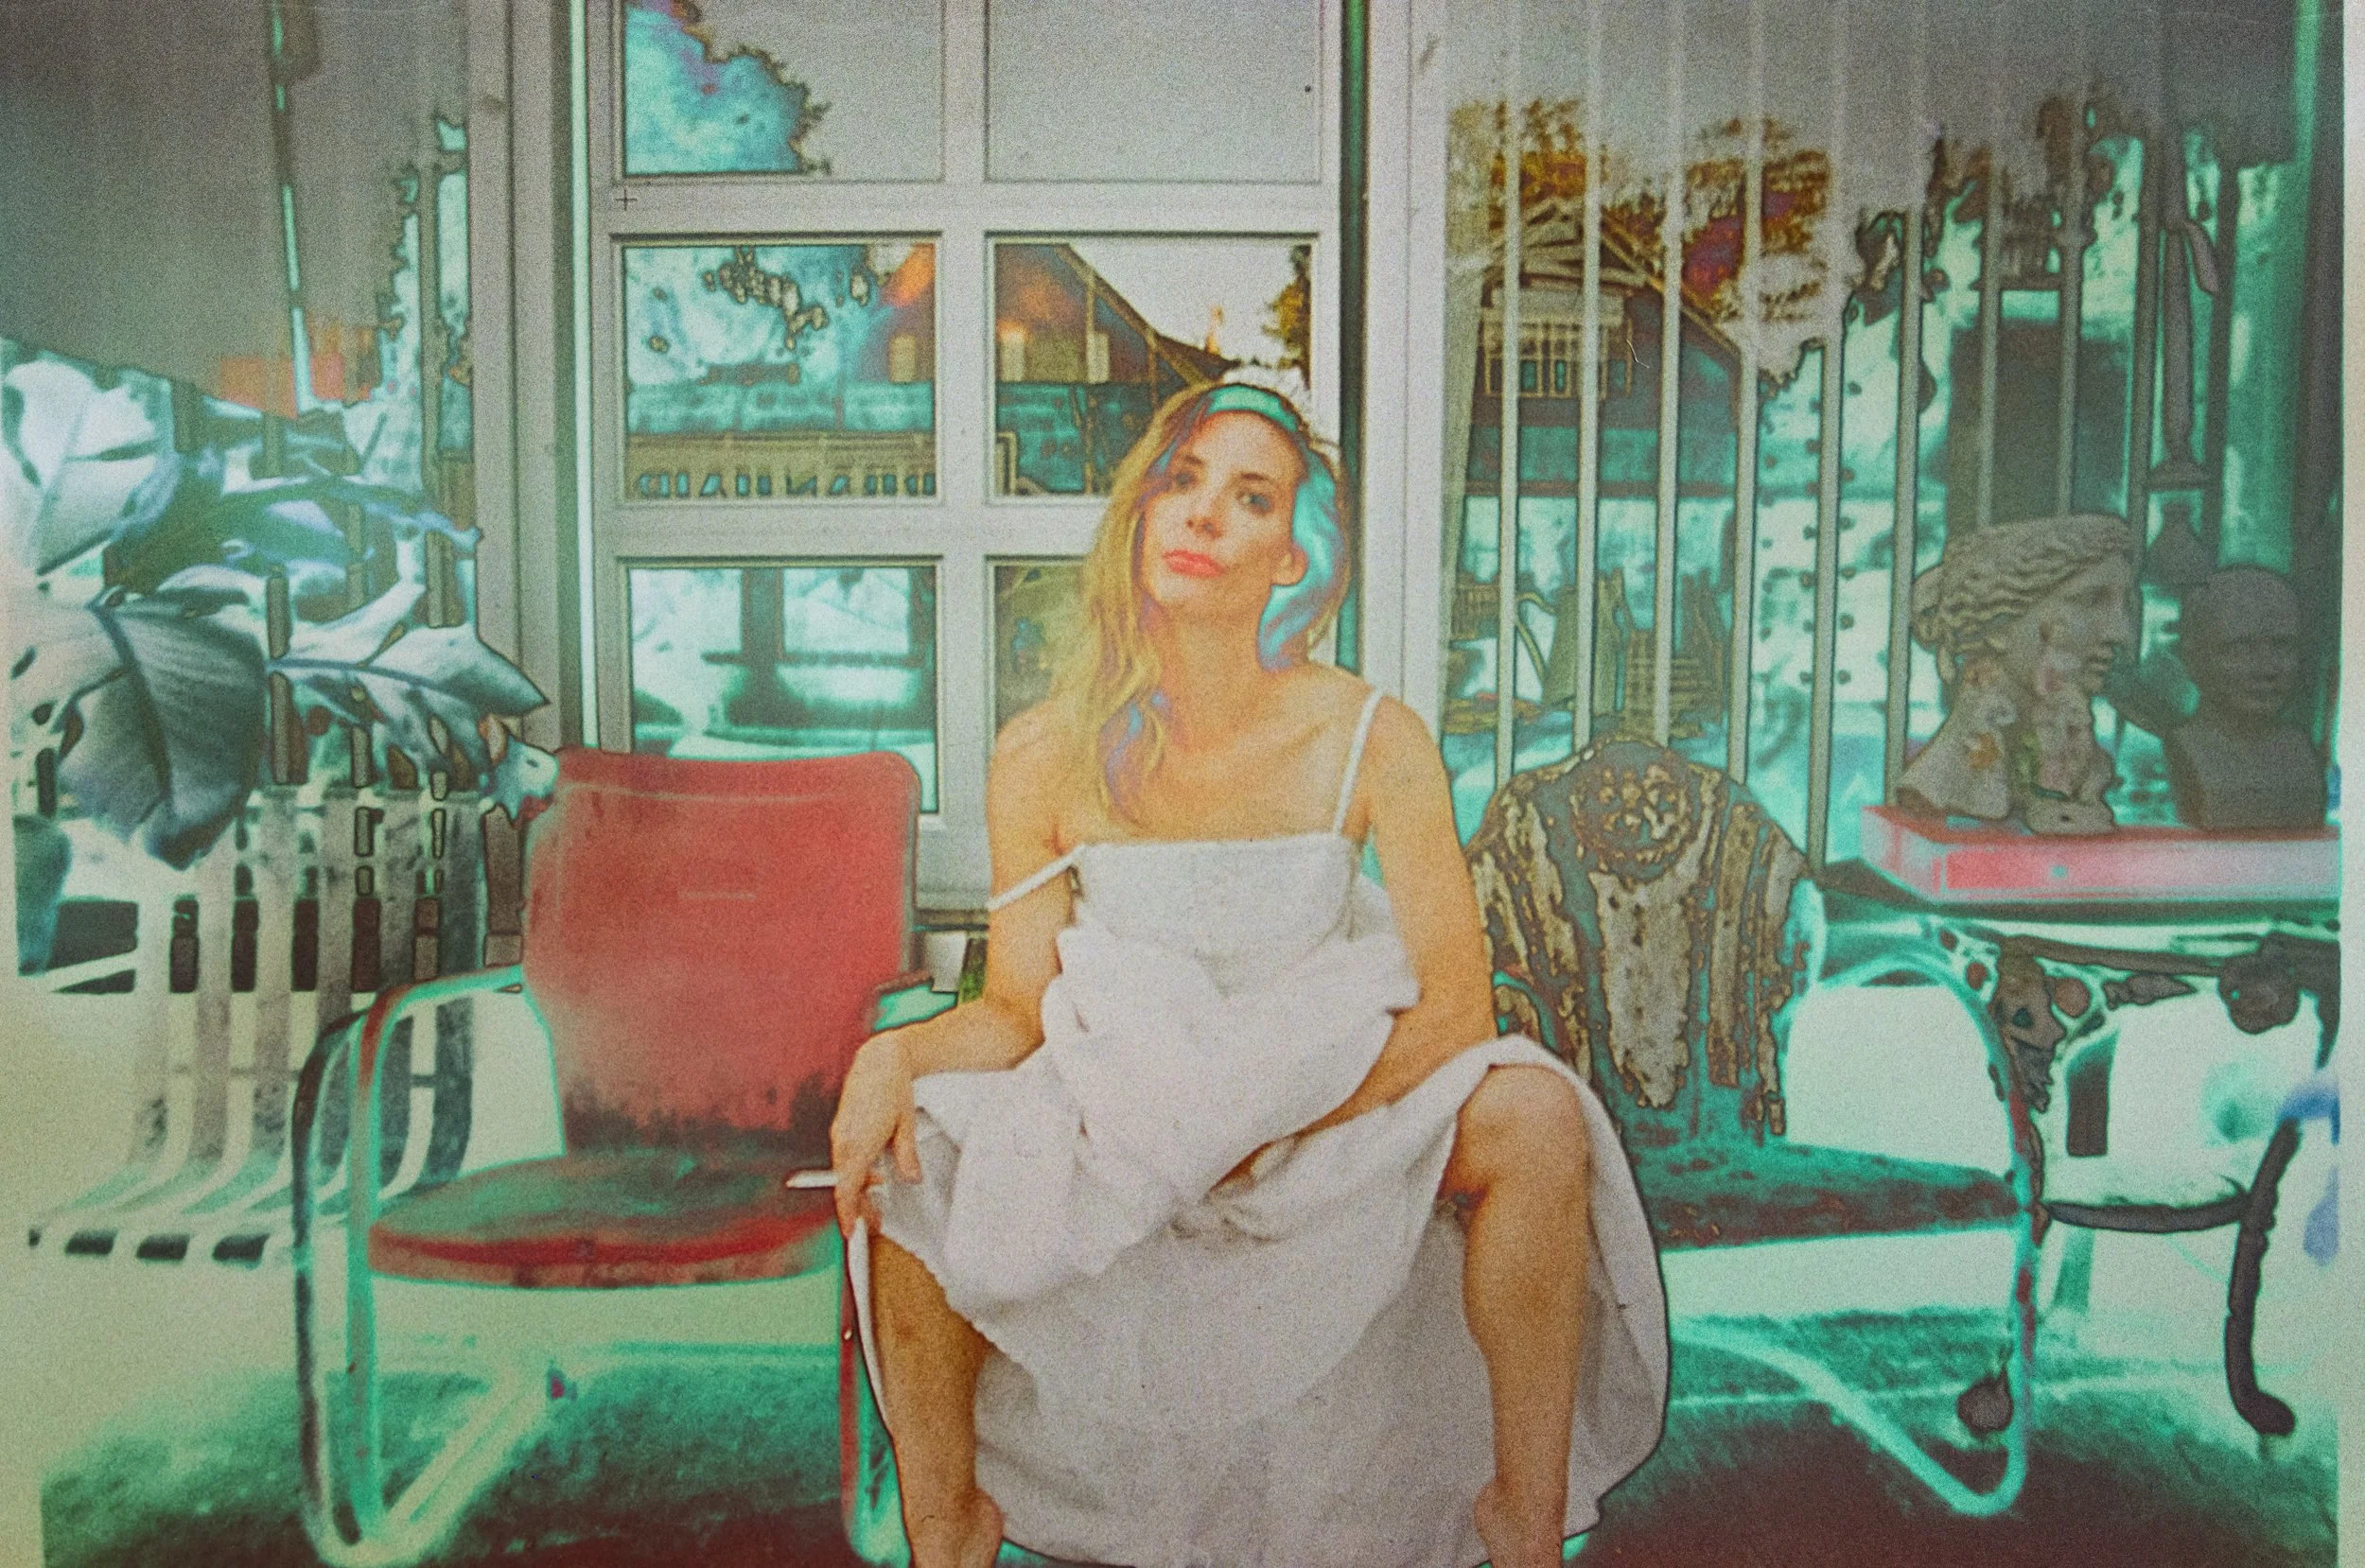
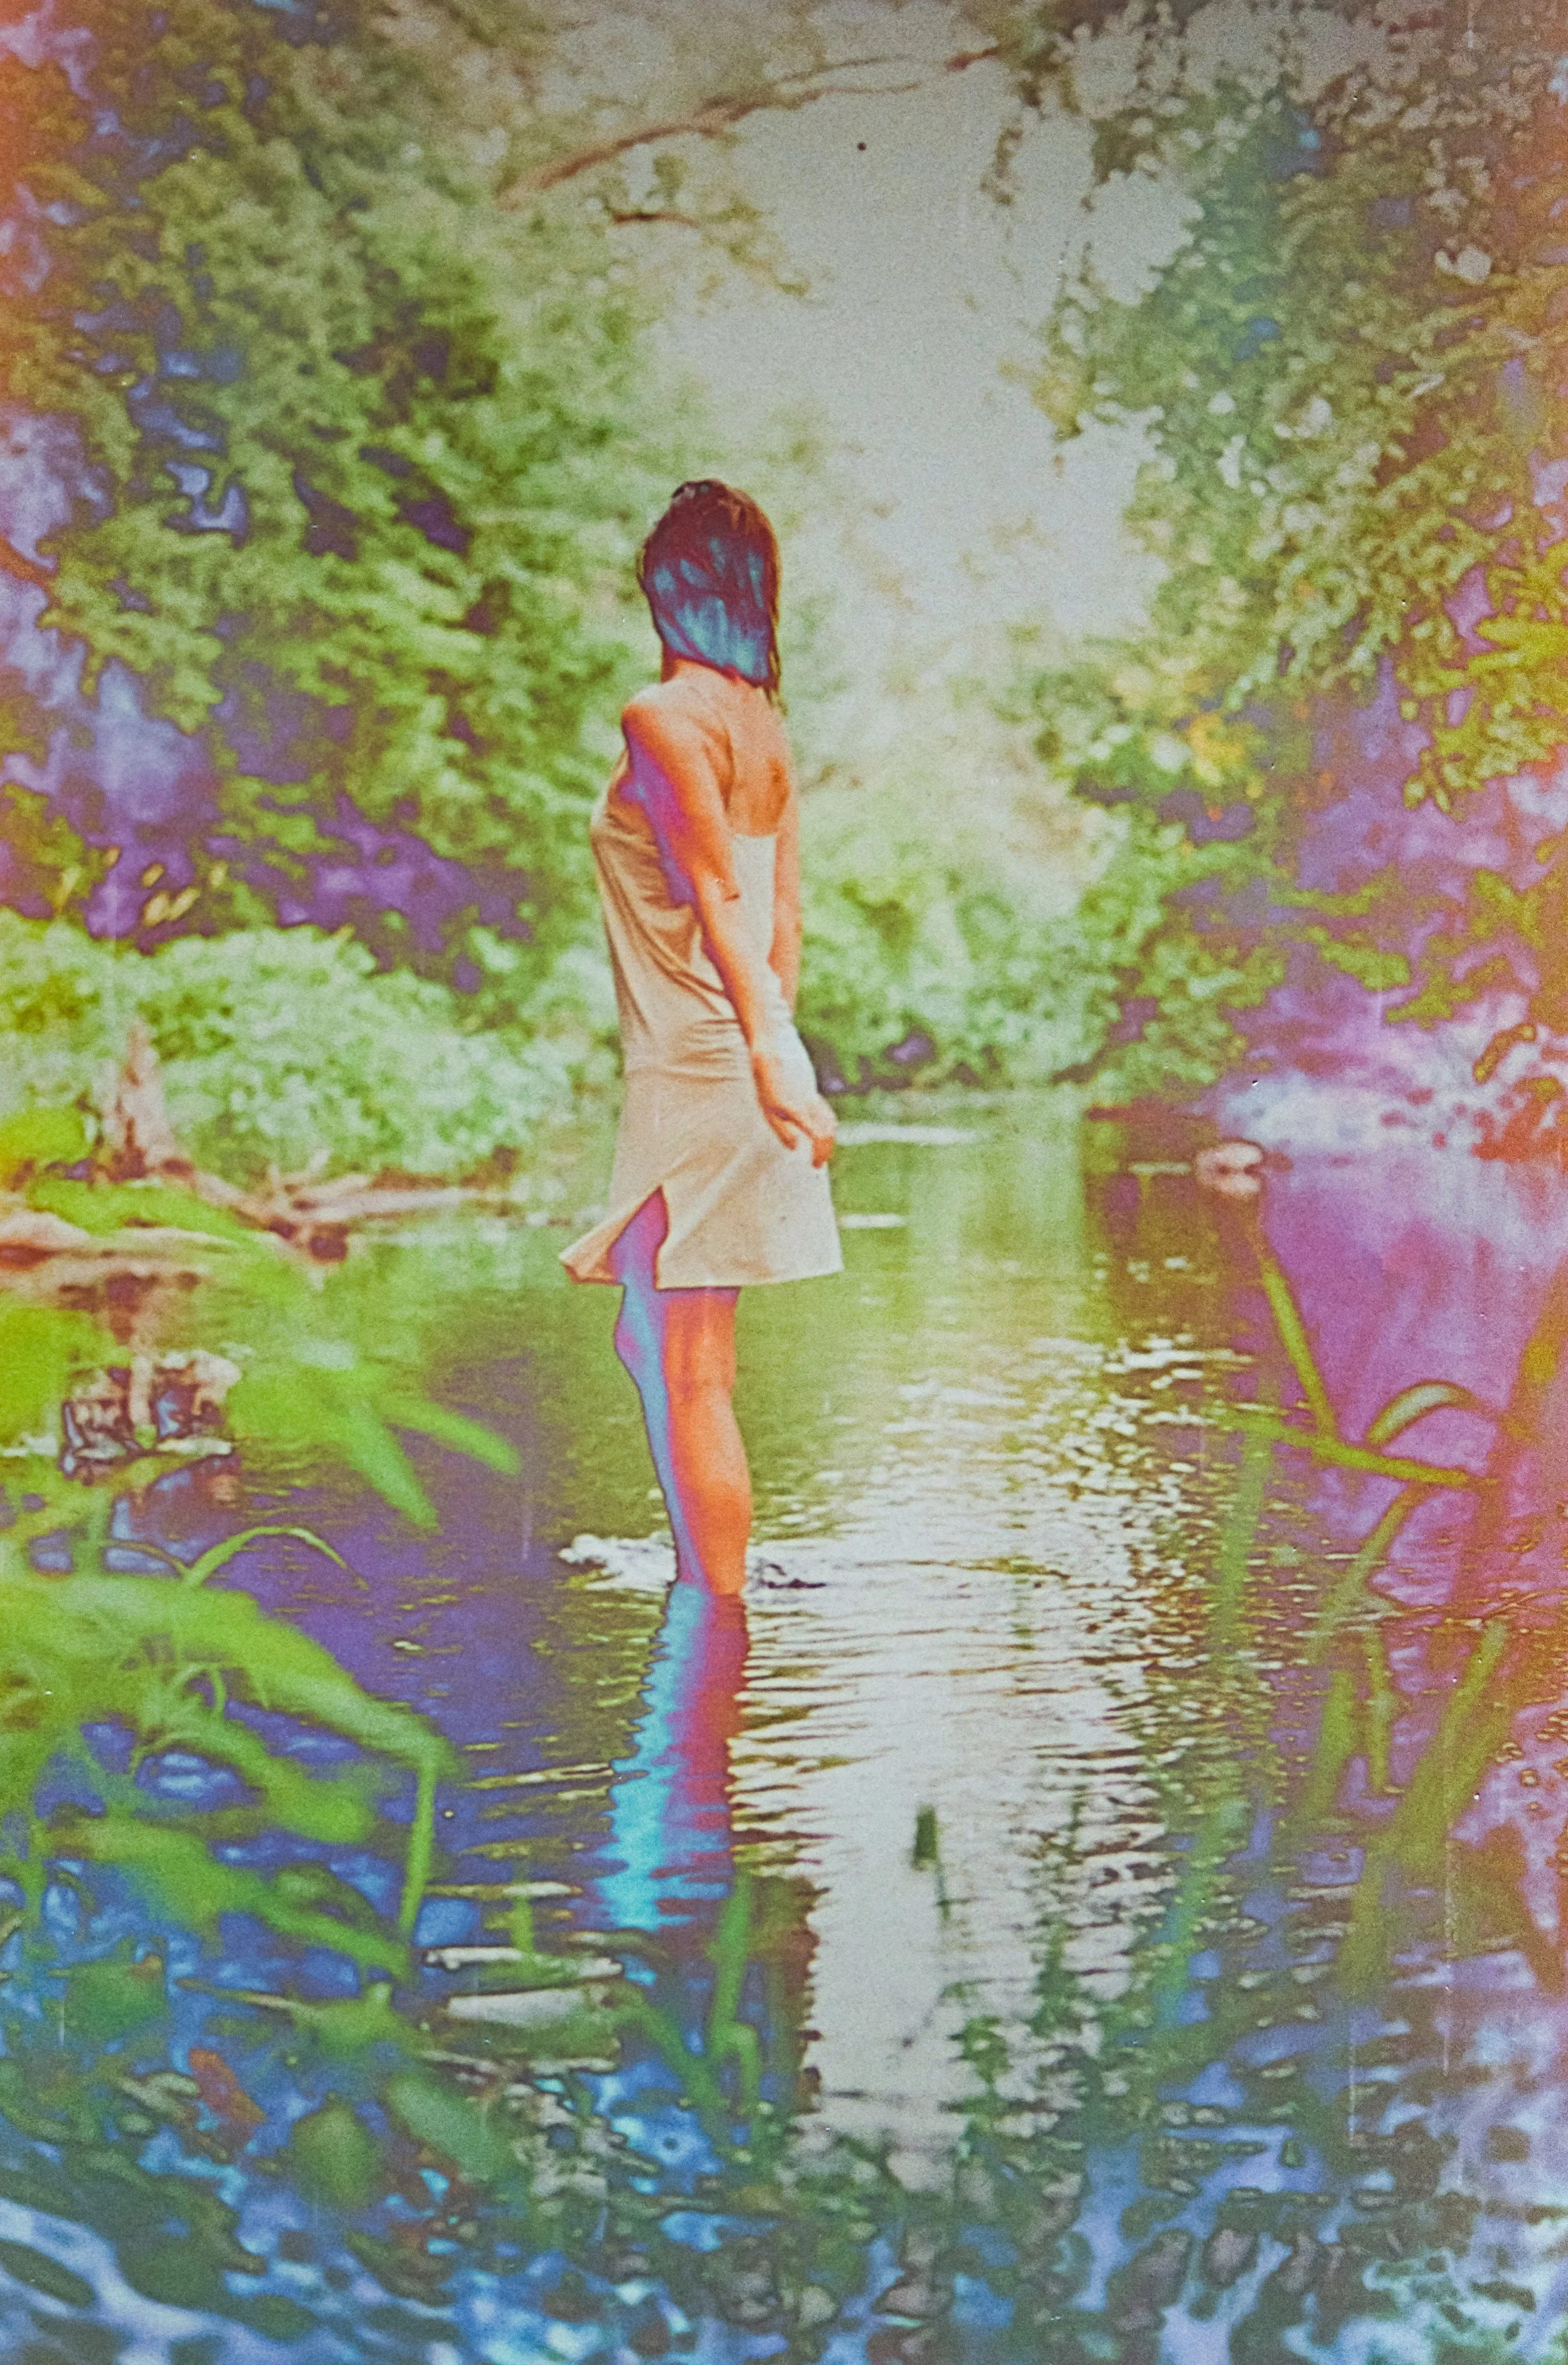
You can also take photos of black and white images and watch as wonky colors appear!
No matter how you choose to solarize your film, just don’t forget that it’s about play. Instead of shying away from the things we are NEVER supposed to do in art, we get to embrace the “what ifs” and take risks and fail and try again.
It’s really just about creating a paradigm shift in our lived lives. When we play in art, we are teaching ourselves that there is no such thing as failure, that magic happens when we show up and embrace accidents, and that there’s always something new to learn.
Basically, get out there, fuck up some film, and have a little fun again. And tag me in any results, because one of my greatest joys is passing along my enthusiasm to others.
Here’s to more play, accidents, and creativity in 2026 🥂